Sunday, November 29, 2015

PREPARING FOR ADVENT

  This year is going to be a challenge getting ready for Christmas with the loss of two family members.  Christmas brings hope and that will be my focus for this Advent.

Advent is the first season of the Christian church year, leading up to Christmas and including the four preceding Sundays. Three purple and one pink candle will be placed into the Advent wreath.


I always enjoy pulling out my rustic advent base that   Dad made for me when I was single.  I attached greenery to the top of the base and not so long ago, I attached a vintage crochet lace around the edges of the base. 


The challenge will be in inventing a new take on my advent wreath.  This year while in the kitchen, my eyes glanced over at my vegetable wire tired basket.  I had an idea.


Placing the Advent base with candles on the top level elevated the wreath and made it quite visual.
But it was too empty on the bottom level.


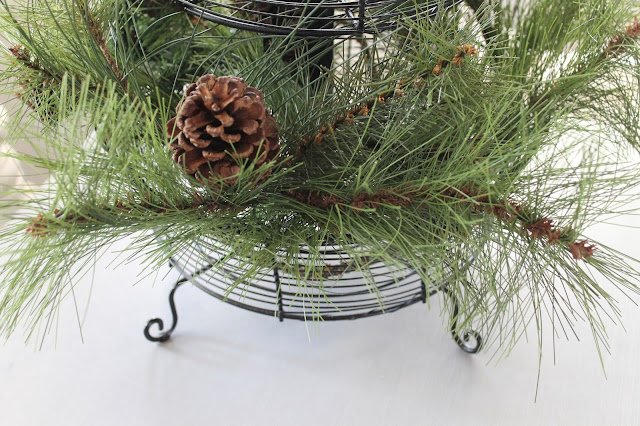
A quick trip upstairs to the greenery tub solved the problem.  Three branches of a long needled pine woven into the recess of the bottom basket completely changed the look of the advent wreath. 


Now, it makes a statement and focuses us to prepare ourselves for the coming of the Christ Child.

Thursday, November 26, 2015

HAPPY THANKSGIVING

For all those traveling these holidays, be safe.  Thanksgiving this year is very bittersweet considering the two losses of family members this year.  Looking back at last year's family picture taken at Thanksgiving, it is difficult to see.  However, as the family started rolling in yesterday, life continues and the family connection remains strong.


Happy Thanksgiving to all and keep your family close. 

Monday, November 23, 2015

THANKSGIVING FOYER 2015

In order to create a foyer setting for Thanksgiving, I took the reframed Thanksgiving print and used that as my starting off point.

Pulling a linen tablecloth with a crochet insert from the sideboard set the first layer of the display.


Gathering my feathers, they were laid in an oblong silver plated estate sale tray.


Dried corn gathered in a bunch was strewn across the foyer table.

Mom's vintage candlesticks from Lourdes were placed with ginger colored candlesticks.


Like setting the Thanksgiving table, it is coming together.
This display welcomes our guests for the November holiday. The lamp being lit brings light into the foyer at night time.

With just a few items, the essence of Thanksgiving is upon us.


Most of these items could decorate the table for the Thanksgiving meal.


May you cherish your family and friends this THANKSGIVING.


Friday, November 20, 2015

ORDINATION CARD FOR PRIEST


  A priest is one of the integral members of the Catholic Church.  He can be your pastor, teacher, confessor and/or a spiritual confidant.

In order to join the Priesthood, one must study and prepare themselves to receive the Sacrament of Holy Orders.

The Sacrament of Holy Orders is the continuation of Christ's priesthood, which He bestowed upon His Apostles; thus, the Catechism of the Catholic Church refers to the Sacrament of Holy Orders as "the sacrament of apostolic ministry."
"Ordination" comes from the Latin word ordinatio, which means to incorporate someone into an order. In the Sacrament of Holy Orders, a man is incorporated into the priesthood of Christ, at one of three levels: the episcopate, the priesthood, or the diaconate.


The Priesthood has a particular wardrobe specific to the vocation. One of the most prominent articles of clothing is a chasuble. 
A chasuble is a sleeveless outer vestment worn by the officiating priest at mass.  (Taken from About.church) 
  
Depending on the time in the Liturgical year, the Priest will wear the color appropriate for that season. The picture below shows the basic colors though they are not limited to these colors.


 When I think of our Priests, this chasuble comes to mind immediately.  To transition into my project for today, I would like to show you a card made especially for a young man's Ordination into the Holy Priesthood.

Making religious cards are very special to me. I have made cards for Deacons, Communion and Confirmation celebrations.  These are very special Sacraments in the Catholic Church.

 A young man from our parish was soon to be ordained and I wanted to congratulate him on this special day.

  A chasuble, the outer vestment worn by a Priest at Mass was the perfect symbol for me to use in creating this card.  I searched and searched until I found this image. The image was very elaborate.  To give it a bit more dimension, I used glue and glitter to embellish the image.


Once the glitter had dried, I cut the image out and glued it onto a background of linen like paper with gold and cream tones.  I bit of silver ribboned lace completes the card.


What do you see when you first glance at the card?  I hope it is the shape of the chasuble. 

 This is a reminder to pray every day for all of our priests that guide us daily.

Saturday, November 14, 2015

REWORKED THANKSGIVING PRINT FROM DAMAGED FRAME

Prior to creating my Valentine's Day collage 3 years ago, I came upon this picture at an estate sale.


The first step was cleaning the glass and frame itself.  After running my fingers over the print itself, it was full of grime.  I took a damp paper towel and wiped down the print.

This was the collage that still hangs in our bedroom.


Even though the frame was damaged, I liked the worn look.

Since I took out the original print, I realized that it reminded me of Thanksgiving.


I picked up a frame at Hobby Lobby for $4.00(a 90% discount) in the discount aisle.  The picture itself needed to be cut down since most of the edges were torn and worn.  This frame was significantly smaller than the original frame.


Here is the reason it was so cheap.  A corner had been damaged, but I knew I could fix that.


Pulling out some spackling compound, I recreated the corner.


This is before I sanded the edges.


Once sanded, I placed the damaged print onto the back of the frame and cut the print down to size to fit into the frame.


I realize that my taping job was rather poor, but I forged ahead.


The corner was sanded.


I used my favorite spray primer to spray the fixed corner.


Primed frame corner.


Using my gilding gold wax, I covered the primer corner.


I can't get over how much more vibrant the print looks in its new gilded frame.

Quite a difference from the original print. 


This newly framed print will be the focus of my Thanksgiving foyer.


Tuesday, November 10, 2015

AUCTION PROJECT-HABITAT RESTORE CABINET DOOR FOR CHRISTMAS FRAME

During the after Christmas sale at Hobby Lobby, I found this beautiful Santa image with background scrapbook cardstock.  It measured 11x11 inches.  At 80% off, it cost under $3.00.  Notice the 2 holes in the bottom of the red background.  I am going to have to find a new background.  At 13 inches in length, I will have to find wrapping paper instead of a normal 12x12 inch sheet of scrapbook paper.


How to incorporate this  image into an auction piece was a challenge.

As I am always on the lookout for interesting cabinet doors, I spied this one at Habitat Restore during February of this year.  What was even more thrilling was the fact that it cost only $3.00.  The additional molding on the middle of the door is the key to creating trays that I have done in the past.  This area inside measures 10x13 inches.  Because the Santa image AND scrapbook paper background measures 11x11, this door would be perfect for this project.


I also picked up this piece of decorative molding.  Even though the grease pencil shows $5.00, the actual price of this item was $1.00.  Whoo hoo!
 
 
 In my vision for this Christmas frame, I would like to attach this molding piece onto the top of the cabinet door.   Initially, I will saw off the two raw edges and sand them.  I will leave the attaching of this piece onto the door to Mr.Thrifty.  It will be interesting to see what he comes up with. 
 
Meanwhile, I will take the knob off the cabinet door.  Since I have many vintage crystal knobs in my stash, I will replace it.
 
Also, the hinges need to be taken off and filled with wood putty.  Once sanded and primed, I will use Lamp Black paint(one of my favorites!) to paint out the cabinet door, front and back.
 
Are you following my vision?  I think it will turn out to be a substantial framed piece once completed.
 

Friday, November 6, 2015

ANNIVERSARY TRAY

 I apologize for not posting the last week.  Please bear with me as we all journey through this grieving process for Terri.  Now, onto this next posting.

It's time  to make an Anniversary tray for a friend.  This friend asked me to help her create a tray for her Mom and Dad's anniversary.  This was fun, because she had a picture to start the project.
After printing off a few Graphics Fairy images, I pulled my doilies out.  Using one rectangular doily and a small round lace doily, we arranged the pictures onto a piece of aqua(color of her room) damask scrapbook paper.
Previously, I had asked her to have her handy husband to attach the two cabinet handles on the tray. 
 Making this memory tray really made her parents happy.

 I hope that the tray will give her Mom and Dad many happy memories in days to come.