Sunday, July 30, 2017

The Nutcrackers-Christmas in July


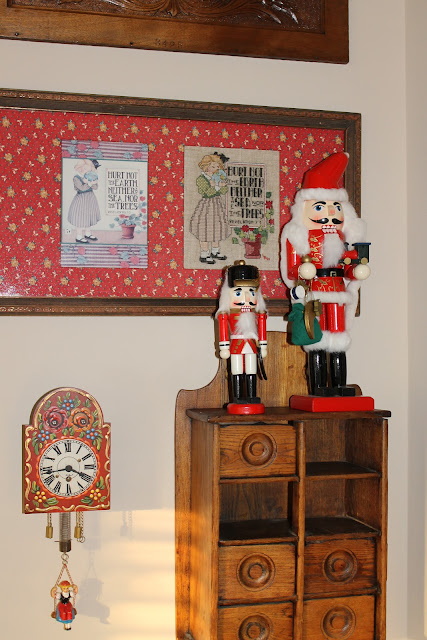
I wanted to share with you the design of one of my girls.  My youngest collects nutcrackers and I gave her the task of making her own display.  This is what she came up with.

A few of the nutcrackers graced the spice cabinet above the grouping of nutcrackers on the floor.

                                                    The sun shines in on the army of nutcracker soldiers.


Tuesday, July 25, 2017

PEACHES HAVE ARRIVED

Finally, the peaches have arrived.  I can usually count on them around the first week of July. 


The girls and I headed out to the Farmer's Market this afternoon. The temperature was 98- ghastly.  But I spied the most beautiful peaches!


How does Peaches and Cream Bars sound?  I'll let you know how they turn out.


Thursday, July 20, 2017

REDOING THE PERENNIAL FLOWER BED


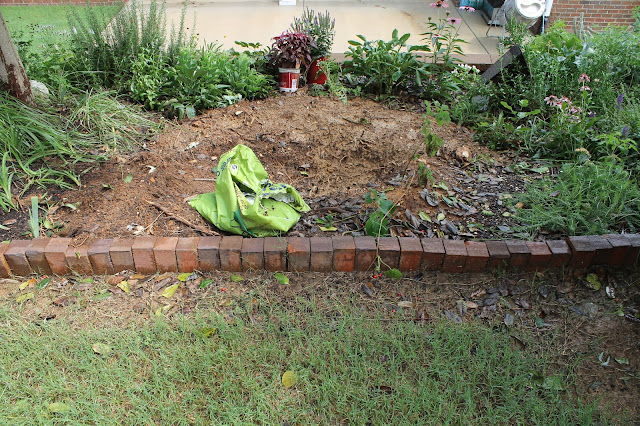
After7 years growth, it was quite obvious that the holly trees were taking over the perennial bed besides infringing upon the oak trees.  I mentioned this thought to Mr. Thrifty and looking back, should have waited until the weather was seasonally comfortable.  So, the July 4th weekend we started the project.  We were wanting to remove the 2 holly trees and leave only 3 remaining trees in the bed.  If anyone knows about digging in southern clay, it is a very back braking job.

After getting approval from our home association, the Mr. first took the large loppers and cut off all the branches.  The holly leaves are quite spiky so this was an obvious first step.  Then, he began to dig out the roots.  After a tiring two days, the trees were gone and it was time to replant the bed.

I put in a lot of compost and top soil to fill in the holes.  I had purchased about 6 new perennials and they were planted with the help of my daughter's boyfriend. Thank you Ham!!!  He helped dig holes and plant the final plants when I thought my body was going to give out.

Though the flower bed looks a little rough for the wear, I think by next spring, I will have a glorious amount of plantings.

 First tree stripped of branches....


Look at the large hole that was left.  A lot of flowers will love that space.


 The second holly tree stripped.....


It is a wonder that roots can even grown in this bed even though we have composted heavily over the years.


2nd tree gone.....


For most of you Yankees, and I say that lovingly, you would never have to use a pick ax to remove roots from your soil.  But, we do....always!


Poor Mr. Thrifty relaxing after the trees removal.  This job almost did him in.  I cannot have projects that are that labor intensive for the Mr. to do anymore.


The bed looks amazing again..


And that is all of the yardwork we will do this summer.


Saturday, July 15, 2017

UPDATED HYDRANGEA CENTERPIECE


After I brought home the hydrangea  centerpiece, I thought it would be easy to make a more permanent arrangement. I removed the wilted, live flowers and began again.

First, I would like to show you the live version of the centerpiece.


So, let's get started.  First, I pulled all the fresh stems out.  I then emptied the water and let it dry out.  It is amazing how much water is held in the floral aqua foam.  This foam is an amazing part of keeping these centerpieces alive and fresh.


Since Michael's was having a 50% off sale, I purchased three hydrangea stems. 


Beautiful blooms....


I cut the individual stems apart and placed them with great ease into the foam.  This was a quick 2 minute redo.


Elegant just like the original centerpiece.


Monday, July 10, 2017

MOSAIC CROSS FOR TEACHER RETIREMENT


I am always looking for crosses to mosaic for gifts or auction donations.  I came across this one at Walmart around Easter.  I snatched it up and put it in the 'projects to do' pile.


The saying on the cross was nice, but I wanted to make it my own. 

Grabbing my can of white spray primer, I gave the piece a good once over.


Already, the cross looks so different. But it's time for a switch up.

I pulled out my china mosaics tub and started pulling dish shards out to reshape the cross.  Honestly, I love to see one these projects unfold.  I never know where I am going, but they always turn out beautiful and unique.  No one is ever alike another.


At this point, the dry fit looks good.  I covered the entire tiled area with painter's tape and press down on the tiles.  Once I turn it over, I just lift off the tape and my tiles will be sticking to the tape.  When I am ready to put the tiles back on after putting the tile adhesive down, it basically is one swoop. 


In order to keep the exact pattern, I use painters tape and tape the entire mosaic area.


Once I put the adhesvie in the recessed area, I just place the taped mosaics right over the adhesive.


Then, I put pressure on the tape and the mosaics will be set.  Overnight drying time and then tomorrow I will grout the cross.


A friend of mine gave me a  Wilton frosting spreader last year.  I knew that this utencil would be a perfect tool for   spreading the adhesive--and this it did.


Using the spreader, I apply a thin coat of adhesive to the recessed area.


The next day, I applied the grout, let it dry for 15 minutes and then clean  up the excess grout.


I made this cross for an amazing teacher at the high school.  She has taught both of my daughters and her dedication in teaching them to write has been nothing short of a miracle.  Besides being their teacher, her spiritual life has made a great impact on them.

I think the numerous pieces of mosaic china pieces represent the many students that have passed through her classroom.  When she glances at her cross, she can remember those lives that she touched.


Monday, July 3, 2017

JULY 4TH BLACKBOARD


Years ago, I upcycled an old living room picture into a blackboard.  Yesterday, it was time to take it out and create a vignette for the July 4th holiday.

I know that this is a very rough drawing on the chalkboard, but I thought it would look cute outside
on the front porch.


 I added my flag bunting to the side of the frame.  I took a trip to Home Depot and purchased a pot of red begonias.

One thing led to another.  The entire front flower beds needed new annuals and a good mulching.


 So much for a relaxing 4th of July weekend.  But, I guess it was all worth it.

 HAPPY JULY 4th!!!!!