Saturday, June 29, 2019

FIREPLACE TILE REFRESH 2


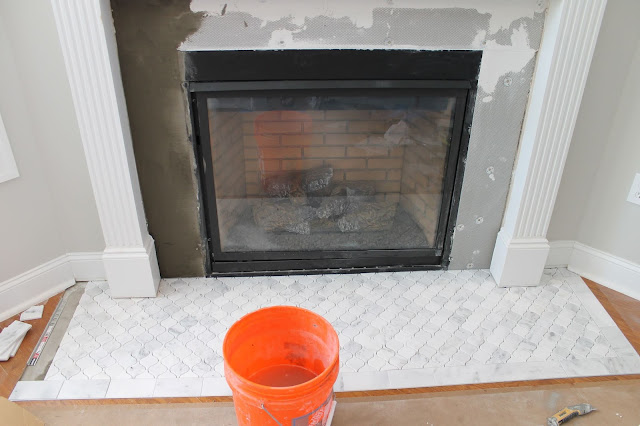
When I bought the tile, the store rep suggested I use non-sanded grout because the Carrera marble scratched so easily.  The color I chose was Rolling Fog.  It seemed logical to use a grey grout compound instead of white.  White grout is sometimes hard to keep clean.


I needed to wait 2 weeks until I could seal the fireplace. After taking a trip to the Tile dealer, I learned since my Carrera marble was polished, I didn't need to seal the tile.  It took over 2 hours to paint on the grout lines. 


While I was sealing the grout, I kept a damp washcloth handy to clean off any sealer that got on the tile.


Once the sealer was dry, I patched a spot that was knicked while they were removing the old tile.  This had to dry overnight.


The next day I sanded and primed the damaged area.  After removing the brown paper from the firebox, I was ready to give the whole mantle a good coat of fresh white glossy paint.


While I painted the mantle, I gave all the baseboards in the room a top coat of white paint too.


And finally, the long awaited project was complete.  I love it!  It is certainly a focal point of the great room now.


Monday, June 24, 2019

FIREPLACE TILE REFRESH I

When we had the house built, we didn't make a choice to have an upgraded tile put on the surround and floor.  They had used the same floor tile that we had in the bathrooms.  I lived with it for 8 years and then knew that I had to improve the look of the mantle.
 

Here is the before picture.


Since we had repainted the living room Sherwin Williams Repose Gray, the tile did not fit the mantle.  I wanted a Carrera marble.  After I looked at many tiles, I decided to use the arabesque Carrera marble.  I loved the shape of the tiles and thought that it would go better with the gray veining and the gray paint. 


The long slender pencil tile would be placed around the actual firebox.


The rectangular pieces would frame the hearth.


As most of you know, Mr. Thrifty and I try to do all of our home projects.  However this time, we needed the experts to complete this task.


We hired Gullion Design and Remodeling. Wayne and Donnie were the amazing artisans that completed the job.  It is quite obvious that their skill level is over the top.  To find craftsmen that are perfectionists in this day in age is challenging.  We were blessed with Wayne and Donnie.  I could not thank them enough for their incredible talent in bringing my vision to reality.


 When the guys came in, they created a plastic wall to keep the dust in.  The front had a zipper to allow the contractor to move in and out without disturbing the walls.  I thought this was cool.
It really kept the dust contained well.


All of the old tile was removed and the hearth pad needed a base of fresh concrete.


DAY 2-With the new concrete hearth dried, it was time to start cutting some tile.


And the inside hearth
.


The adhesive was done and the job needed to wait overnight to dry.

Stay tuned you FIREPLACE TILE REFRESH 2.


Sunday, June 16, 2019

UPDATED BEDROOM 2019


Happy Father's Day to all the Dads out there! We shall remember our Dads that are in heaven now.


This past January, Mr. Thrifty painted our bedroom.  I was tired of the contractor's beige paint.  My friend Tara had introduced me to Eider White, a Sherwin Williams color that just  happened to have been on my gray swatch from the store.  The room became refreshed with the clean white paint.  The high gloss white crown molding popped against the new white color. 

This picture shows the Navajo beige paint on the walls before repainting.


The eider white has a bit of grey tint to it.   It has such a clean look to the room now.


Now, I want to paint my craft room with this same color.  This is my new neutral color for the house.  I love eider white!


MAKING AN ELEVATED TRAY FOR BUFFET TABLE

Wednesday, June 12, 2019

CHERVAL MIRROR UPDATED


I purchased this mirror while we lived in Massachusetts.   It lived in the girls room while they were younger.  Once we moved to Alabama, it didn't fit with either décor.  I moved it into my room and pondered about refinishing it.

At the top of the frame was a resin 3 dimensional geranium.  I asked Mr. Thrifty to take it off but he was busy. 

I pulled out a putty knife and a hammer and took a whack at the resin piece.  It instantly came off.  Now, that was easy.

I took the mirror outside and realized that I couldn't take the mirror off because it was glued to the back.  I taped off the mirror and began sanding the frame with the mouse sander.
To my surprise, it was beautiful maple and not mdf board which I was expecting.

Then I took the legs off and continued stripping and cleaning the wood frame.

After a tedious 4 days of sanding, the piece was ready for paint.  At this point, I decided instead of painting to stain the piece with a driftwood stain.  I researched stain on line and ordered DIY driftwood stain.  It came in packets.  One packet mixed with one cup of water was enough to stain this piece 3 times.  I hoped to get a darker color with the added coats of stain.

This next picture shows the second coat of stain. The directions suggest if at all possible to dry in the sun because it will give you a darker color.  I let it dry overnight.

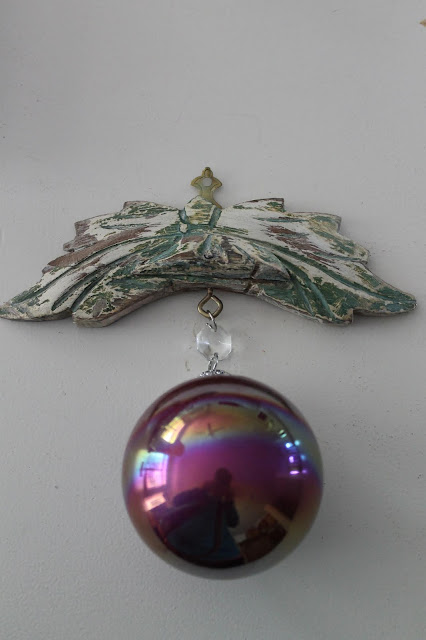
In the meantime, I took an ornament that my friend Tara had given me and pulled the wooden piece off.  I wanted to glue this to a part of the frame.

I sanded the piece and was very happy with the color of the wood.


I stained this piece with another coat of the driftwood.  It did darken the piece considerably.
I used wood glue to attach the ornamental piece onto the connecting wood at the bottom.
Then using white wax, I gave it a coat.  The white wax lay in the crevices nicely.  I buffed the entire frame.


I placed the mirror in front of the bedroom door to show how well the pediment color matched the mirror frame.


 I really like this finish.  It reminds me of an old European finish that you see on antique furniture.  I'll be using the driftwood stain again.

Thursday, June 6, 2019

BIRTHDAY CARD 2019


My annual birthday card is ready for mailing.  This year, I decided on a French theme incorporating food. 

I used black and white French background paper.  I found a fabulous strawberry image online, printed it on cardstock, cut it out and added red glitter to the berries.


For an accent at the bottom of the card, I used a few black and white paper with gingham checks.
I printed off HAPPY BIRTHDAY on white vellum and glued it at the bottom of the card.


I made multiples of the card so I would have them ready.
I'm ready for 2019!