Just returned from our 4th annual Sister's Weekend in New Orleans. We had to stop by the famous Cafe Du Monde.
Couldn't pass up the opportunity to try their favorite food especially the delectable beignets.
I bought a postcard with the recipe to share with all of you. I know my kids will enjoy these smothered in powdered sugar.
Here is a closeup in case you can't read the recipe.
My fabulous sister Terri snapped a picture before we inhaled the delight. I think it was gone before you could blink. Thanks Terri! She usually documents every food delicacy that we eat on our travels.
Maybe I will try these for a holiday treat.
Tuesday, October 23, 2012
Friday, October 19, 2012
Halloween Witch Wreath
My friend Tara made a bunny using a scroll saw and some luanne(thin wood paneling) years ago. It looked adorable on my Easter wreath. Adding some spring berry twigs and lavender crystals made a very fun Spring wreath.
I was trying to come up with an auction idea for fall. Witches came to mind.
I had not used my scroll saw before, so I found a template on the Internet and practice on scrap wood. It was pretty easy. In order to give the design some dimension, I glued black glitter to some areas of the witch. I like the way that the glitter throws light around at night time.
And here is the witch.
I was trying to come up with an auction idea for fall. Witches came to mind.
I had not used my scroll saw before, so I found a template on the Internet and practice on scrap wood. It was pretty easy. In order to give the design some dimension, I glued black glitter to some areas of the witch. I like the way that the glitter throws light around at night time.
And here is the witch.
To add whimsy, I drilled 6 holes in the scallops at the bottom of the witch. Using scrapbook puffy letters, I glued them onto round labels and hung them from the holes.
BEWARE
To complete this project, I pulled an old window out of the garage stash and washed the frame down.
Using a coupon at Hobby Lobby, I purchased a plain willow wreath. A vintage crystal knob screwed into the top of the frame was a great hanger for the wreath. The witch was then wired onto the wreath.
And there you have it, a very primitive but cute Halloween wall display.
Using the window and wreath all year round, you could create different templates for all the seasons.
Tuesday, October 16, 2012
Oriental Ginger Jars
The pair of Oriental jars were given to me by a dear friend. I loved them instantly. They were not your average cobalt and white ceramics that we are used to seeing. These ginger jars had fabulous orange and pink blossoms on them.
A silver-plated cupcake stand elevates one ginger jar.
Arranging some pumpkins, a glass dome, a teacup and saucer and fishing basket lamp was all that was needed to set the stage for an autumnal display.
Can't you wait to cozy up to a roaring fire in the fireplace?
Look at table top accessories in your home to create a scene. There is nothing 'autumn' about these ginger jars, but I think they work beautifully on the library table with a bit of embellishment from the faux pumpkins. Think out of the box!
Arranging some pumpkins, a glass dome, a teacup and saucer and fishing basket lamp was all that was needed to set the stage for an autumnal display.
Can't you wait to cozy up to a roaring fire in the fireplace?
Look at table top accessories in your home to create a scene. There is nothing 'autumn' about these ginger jars, but I think they work beautifully on the library table with a bit of embellishment from the faux pumpkins. Think out of the box!
Saturday, October 13, 2012
Chandelier II
I almost forgot about my second up cycled chandelier. This one did not come with candle cups to hold the crystals onto each arm.
I checked on line and found a place that not only sold the crystals for a reasonable price, but found glass bobeches. The bobeches take the place of the candle cup. Each bobeche contains 5 small rings attached to the outside. On these rings you can attach your crystals.
The first step is to wipe all the dirt and grime off the fixture. Take out the lightbulbs and stuff one paper towel wadded up into that space. This will protect the connection point from paint.
I like to suspend my lights from a set up ladder that has plastic around the exterior, making a spraying tent of sorts. This is a different fixture, but it shows how to hang it for spray painting.
Using any white primer, coat the entire piece. Open the plastic curtain and let dry at least overnight. The next day, topcoat with white appliance spray coats. Do at least 2 coats waiting one day between them.
Here is a picture of the bobeches. The cost around $5.00 apiece. Shop around. I have not been successful scouring them at flea markets or antique stores. It is hard to get at least 5 matching ones.
The crystals come in a multitude of colors. The clear ones are standard. They also have various shapes, and sizes when choosing crystals.
There is also chandelier chain that can be added to drape on your chandelier. It usually comes in lengths. I divide the length up when I get ready to hang it. All you need is a jewelry pliers to open and close the connectors.
A little side note. Before you hang any of the glass pieces on the lamp, I recommend the very best glass cleaner. I pick it up at WalMart or Sam's. I use this product on all glass and mirrors in my house. It does not streak. The name of this product is Sprayway Glass Cleaner.
Here is the chandelier all assembled. There are no right or wrong ways to adorn a chandelier. Use your imagination.
The glass bobeches add much more sparkle and added reflection.
This chandelier makes a great reading lamp.
I checked on line and found a place that not only sold the crystals for a reasonable price, but found glass bobeches. The bobeches take the place of the candle cup. Each bobeche contains 5 small rings attached to the outside. On these rings you can attach your crystals.
The first step is to wipe all the dirt and grime off the fixture. Take out the lightbulbs and stuff one paper towel wadded up into that space. This will protect the connection point from paint.
I like to suspend my lights from a set up ladder that has plastic around the exterior, making a spraying tent of sorts. This is a different fixture, but it shows how to hang it for spray painting.
Using any white primer, coat the entire piece. Open the plastic curtain and let dry at least overnight. The next day, topcoat with white appliance spray coats. Do at least 2 coats waiting one day between them.
Here is a picture of the bobeches. The cost around $5.00 apiece. Shop around. I have not been successful scouring them at flea markets or antique stores. It is hard to get at least 5 matching ones.
The crystals come in a multitude of colors. The clear ones are standard. They also have various shapes, and sizes when choosing crystals.
There is also chandelier chain that can be added to drape on your chandelier. It usually comes in lengths. I divide the length up when I get ready to hang it. All you need is a jewelry pliers to open and close the connectors.
A little side note. Before you hang any of the glass pieces on the lamp, I recommend the very best glass cleaner. I pick it up at WalMart or Sam's. I use this product on all glass and mirrors in my house. It does not streak. The name of this product is Sprayway Glass Cleaner.
Here is the chandelier all assembled. There are no right or wrong ways to adorn a chandelier. Use your imagination.
The glass bobeches add much more sparkle and added reflection.
This chandelier makes a great reading lamp.
This fixture adds a lot of character to the room.
Tuesday, October 9, 2012
Hankie Lampshade
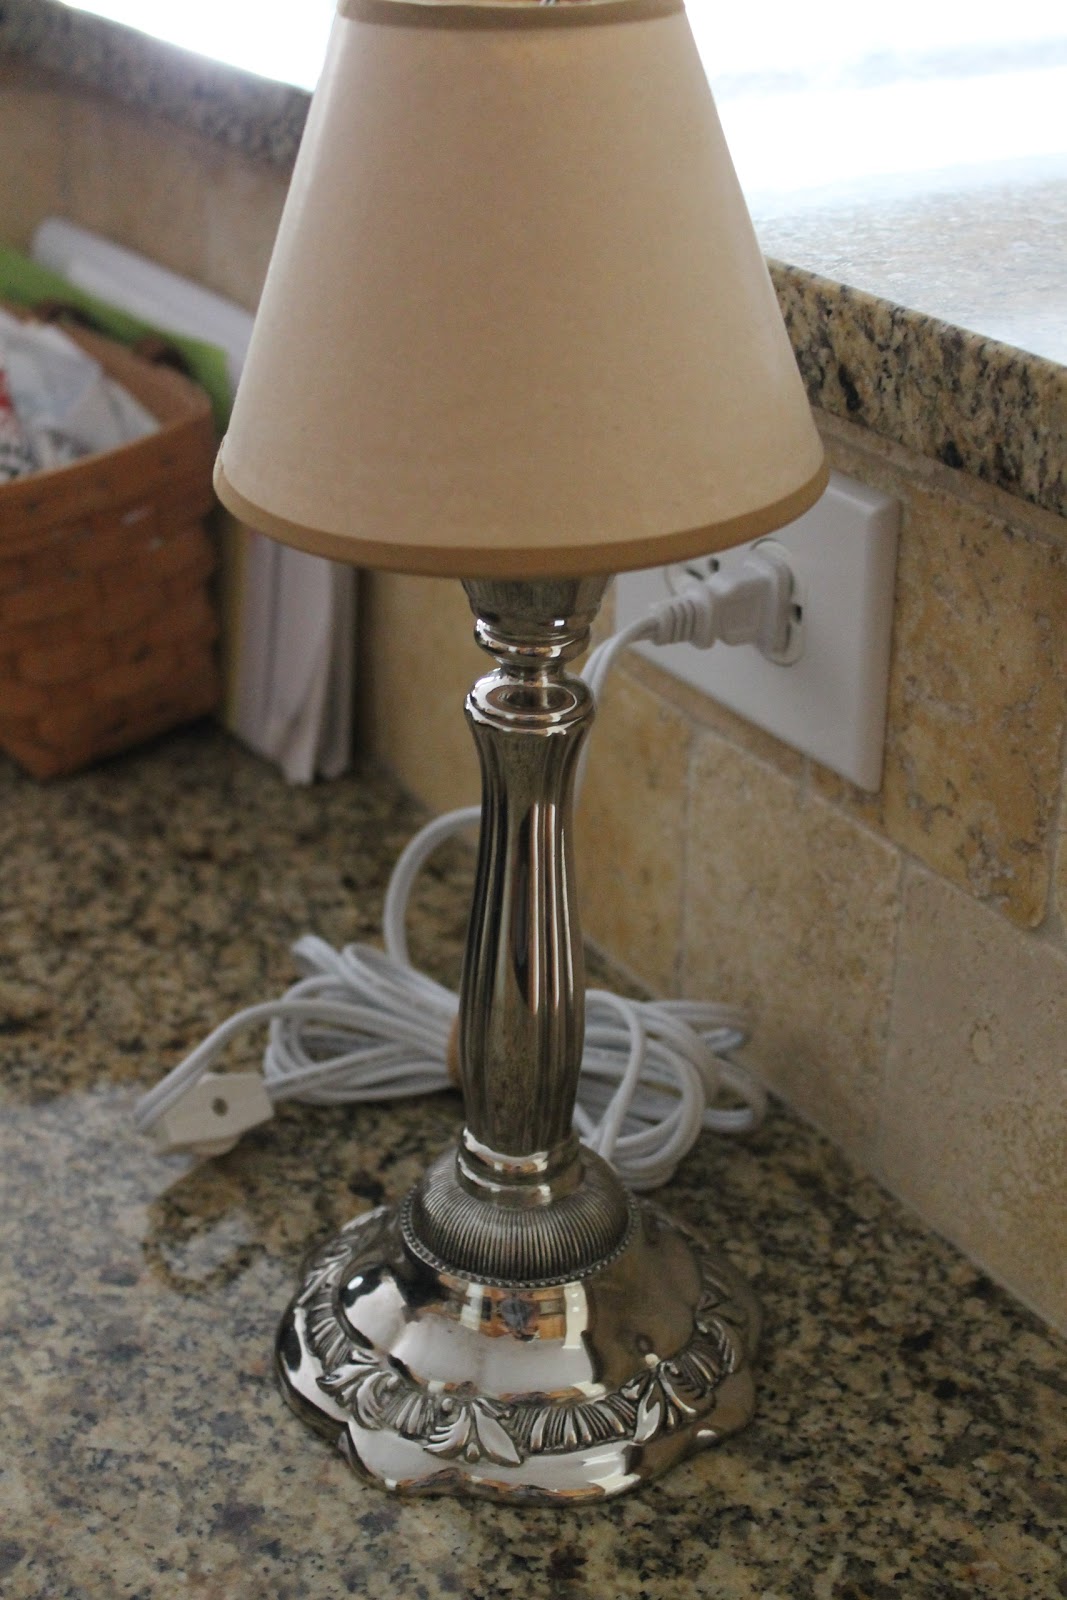
I found this precious candlestick lamp at Goodwill for $3.99. Once I brought it home, I cleaned it up with silver polish. Then, I went to the stash and pulled an unfinished shade for it.
You see many exposed lampshade skeletons around in decorating. I soaked the shade with water until all the paper came off. Then, I ran into a problem. The two parts of the skeleton only stayed together with the paper sheath. Now, I had two separate rings. I had to come up with an idea to conjoin them together again. I had some twine upstairs. I cut three equal pieces of the twine and knotted both parts together securing them with knots. Now the skeleton hung over the light bulb. I tried to think of an out of the box type shade.
The lamp was very primitive, but not quite finished. I needed an idea.......................
While on this same trip home, the girls and I visited a thrift shop in Mom's neighborhood. My youngest brought up a beautiful hanky to show me.(She knows what catches my eye!) I unfolded the hanky and to my surprise I found a name imprinted on one corner of the piece. This hanky truly had a life before ending up at the thrift shop.
Immediately, it became very special to me and I wanted to find a place to carry on its use. I purchased the hanky for $1.00.
It seems a Miss or Mrs. Hemmer did not want to lose this hanky. I don't blame her. It is a beautiful handkerchief.
To cut off the name to reuse the hanky seemed sinful, so I had to come up with an idea to incorporate it into a future project.
The delicate lace edging could not be destroyed.
Not much time passed before I realized that I could marry these two latest finds. Some people will cringe to see what happened next. I took a fabric scissors out and cut a hole in the middle of the hanky.
Grabbing a needle and white thread, I secured the hanky over the lamp skeleton.
The hanky hangs randomly over the frame. I love it!
And Miss or Mrs. Hemmer's hanky lives on in a new light.
You see many exposed lampshade skeletons around in decorating. I soaked the shade with water until all the paper came off. Then, I ran into a problem. The two parts of the skeleton only stayed together with the paper sheath. Now, I had two separate rings. I had to come up with an idea to conjoin them together again. I had some twine upstairs. I cut three equal pieces of the twine and knotted both parts together securing them with knots. Now the skeleton hung over the light bulb. I tried to think of an out of the box type shade.
The lamp was very primitive, but not quite finished. I needed an idea.......................
While on this same trip home, the girls and I visited a thrift shop in Mom's neighborhood. My youngest brought up a beautiful hanky to show me.(She knows what catches my eye!) I unfolded the hanky and to my surprise I found a name imprinted on one corner of the piece. This hanky truly had a life before ending up at the thrift shop.
Immediately, it became very special to me and I wanted to find a place to carry on its use. I purchased the hanky for $1.00.
It seems a Miss or Mrs. Hemmer did not want to lose this hanky. I don't blame her. It is a beautiful handkerchief.
To cut off the name to reuse the hanky seemed sinful, so I had to come up with an idea to incorporate it into a future project.
The delicate lace edging could not be destroyed.
Not much time passed before I realized that I could marry these two latest finds. Some people will cringe to see what happened next. I took a fabric scissors out and cut a hole in the middle of the hanky.
Grabbing a needle and white thread, I secured the hanky over the lamp skeleton.
The hanky hangs randomly over the frame. I love it!
And Miss or Mrs. Hemmer's hanky lives on in a new light.
Friday, October 5, 2012
Up Cycling a Glass Dome
I have a few glass domes that cover items through out the year. I saw a post online a few weeks ago. They had purchased a lamp finial and glued it to the top of a glass dome.
Lowe's had a variety of finials. I purchased a glass and bronzed finial. This finial cost under $3.00.
Out of the package, the finial looks better. The top piece is real glass.
The blog glued the finial to the top of the dome.
I wanted it to be temporary, so I pulled out my blue tacky(used for hanging wall posters) and put some on the underneath part of the finial. I placed it on top of the dome and it created a new look.
The finial dresses up the dome quite nicely.
The best part of this makeover is the small amount of time and money it took to kick it up a notch.
Lowe's had a variety of finials. I purchased a glass and bronzed finial. This finial cost under $3.00.
Out of the package, the finial looks better. The top piece is real glass.
The blog glued the finial to the top of the dome.
The finial dresses up the dome quite nicely.
The best part of this makeover is the small amount of time and money it took to kick it up a notch.
Monday, October 1, 2012
October Mantle
I vowed that this month I would not spend one dime on creating the mantle decorations. Being the first week of October, it is too early to do a Halloween theme. Everything on this mantle was stashed around the house.
I pulled out my tubs of faux pumpkins and wood accents and began. Orange was the color that I wanted to build on. My grandmother had this vintage wooden Japanese tea box in her basement. I wouldn't be surprised if it came from the grandfather's grocery store. Grandma used it for her skeins of yarn.
I also had a decorative piece that I had stripped years ago. At that time, I stained and polyurethane the piano panel.
This time I wanted to do an asymmetrical look, so I started building using the tea box and two woven baskets. Grouping three pumpkins added a bit of height.
I found very reasonably priced pheasant feathers last year through Oriental Trading Company. I had planned to use them in an autumnal flower arrangement, but instead chose to tie the bunch off with a rubber band and lean them against the decorative piano panel.
To balance this out with some dark wood with texture, I pulled out a hand carved wood lid with matching bowl that was given to me by my husband. He bought it from a villager in Bosnia when he was deployed there. The intricate cut work design is all hand cut. The talent of these type of artisans is not too common in the states anymore.
Some tree limbs add dimension.
A look of the whole mantle gives the room an autumnal feel.
I pulled out my tubs of faux pumpkins and wood accents and began. Orange was the color that I wanted to build on. My grandmother had this vintage wooden Japanese tea box in her basement. I wouldn't be surprised if it came from the grandfather's grocery store. Grandma used it for her skeins of yarn.
I also had a decorative piece that I had stripped years ago. At that time, I stained and polyurethane the piano panel.
This time I wanted to do an asymmetrical look, so I started building using the tea box and two woven baskets. Grouping three pumpkins added a bit of height.
I found very reasonably priced pheasant feathers last year through Oriental Trading Company. I had planned to use them in an autumnal flower arrangement, but instead chose to tie the bunch off with a rubber band and lean them against the decorative piano panel.
To balance this out with some dark wood with texture, I pulled out a hand carved wood lid with matching bowl that was given to me by my husband. He bought it from a villager in Bosnia when he was deployed there. The intricate cut work design is all hand cut. The talent of these type of artisans is not too common in the states anymore.
A few faux pumpkins grace the remainder of the mantle. A fall wreath lays casually on top of the stack of baskets. The ironstone candy dish was bought at an estate sale for $1.00 last year. You can't see it in the picture, but the top of the dish is lopsided on the stem. Maybe that was the reason is cost so little.
I succeeded in creating the whole scene for nothing. Now we are ready to stoke the fireplace and simmer some cider.
Subscribe to:
Posts (Atom)