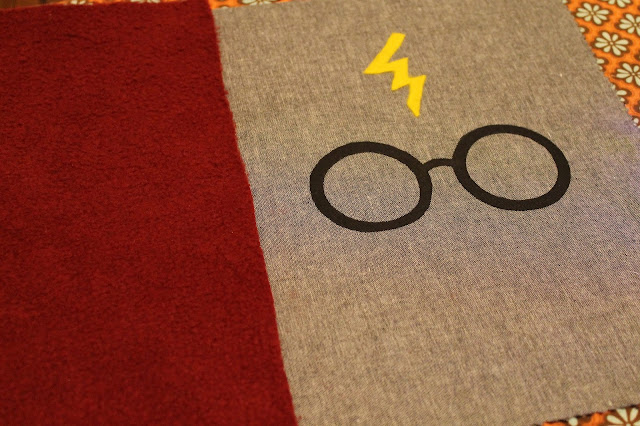
Here is a quick 2 hour craft project.
My graduating senior came to me and asked about a birthday present for a friend of hers that loves Harry Potter. A pillow would be a quick present to put together--hmmmm.
It took about 1 minute for me to sketch my idea on paper. I liked the glasses but didn't like the temples. I had to laugh at my senior. My daughter couldn't figure out my sketch at all.
I asked my daughter to Google-Harry Potter glasses and this is what came up. Loved it!! And it even had his scar.
We jumped in the car and headed to Wal-Mart.
The first item I put in my cart was the fiberfill to stuff the pillow itself.
The next item on my list was a gray fabric for the pillow itself. This fabric jumped out at me. It was a simple gray cotton material. I bought a half of a yard of fabric because by the time I really got into my quest, my daughter asked if I could make her one too. How could I say no?
To mimic Harry's scarf, I began looking for a wine colored fleece. I thought that the variety of textures would really be fun to incorporate into this project. The store didn't have any, so I went looking for my next material to create his glasses.
By this point I was flying down the aisles to find a black material with adhesive. I stopped at the patches and knew that I had hit pay dirt. They remind me of the days when Mom would have to patch my brothers' pants because of the holes in the knees. The fact that there were 2 patches in the kit was a bonus.(2 pairs of glasses)
The last item I picked up a piece of yellow felt to make Harry's scar. For 23 cents, this was the perfect material.
We paid for our items and then headed down the street to find the burgundy colored fleece. We weren't in the store but 2 minutes and I had found the perfect color-wine.
With 30% off the fabric, a quarter of a yard cost $1.75. This project was a very economical deal for all the materials needed for the pillows. For about $5.00 minus the stuffing, I was able to make the two pillows.
Once we arrived home, I went to the spice cabinet and pulled out a jar and a juice glass to trace the glasses on to the back of the patch. First, I traced around the juice glass. Then, I traced the spice jar lid into both circles. The material cut very easily.
I also cut out 2 yellow scar patterns out of the felt.
I also cut out 2 yellow scar patterns out of the felt.
My daughter cut the glasses out and they turned out perfectly.
It's coming together. Now I had to figure out how to attach the fleece scarf material to the pillow.
The glasses were attached using the iron. Remember to turn off the steam element on your iron.
I used fusible bonding webbing on a roll to attach the yellow scar.
I sewed the top of the fleece to the top of the front of the pillow. I then sewed a seam across the bottom of the gray fabric so the wine fleece could be attached in two places. The bottom seam was sewed about one inch from the bottom of the gray fabric. You will find out soon why it was important to do this step.
I then put right sides together folding the fleece up so it wouldn't be sewn into the bottom seam of the pillow. Once inverted, I cut the fringe at the bottom of the fleece about 2 inches up.
Can you see where the 'scarf' is attached at the bottom?
Once the pillow was stuffed it was finished.
When both of them were done, they were not exactly the same size. The pillow on the right has the glasses a bit too far to the right. The placement on the left pillow is perfect--until my daughter tells me that the scar is upside down. I was afraid that if I tried to remove the scar, the fabric would tear. She said it was fine and to leave it be.
I hope the two of them enjoy their new pillows to use on their dorm beds. Another use for the pillow could be that the kids can slide their cell phones under the scarf and it will remain somewhat secure. You know these kids cannot be far from their cell phones!
So another project completed. I could use the same idea on future gifts.


No comments:
Post a Comment