I have to warn you, this is a very long posting. I want to give you all the information that will help you smoke your own brisket--bear with me.
Like we did with smoking our pork butt, we watched numerous videos on smoking beef briskets. Our favorite video was with Franklin smoking briskets. I would advise you to watch a few of these which entail trimming, smoking and cutting the brisket after it is smoked.
The brisket escapade really came about because Kroger had a huge sale on them. I have paid about $5.99 a lb. when I cook briskets for our Church. This week, they were $1.99 lb. I am embarrassed to say, I purchased 2 full sized briskets and then 2 the size of the one pictured below.
The Mr. and I planned our grilling event for the next weekend. I decided to try our hand on the smaller size brisket first.

I need to tell all of you that I did have the luxury of having freezer space so there was not a problem with the remaining meat.
Ok, so once we opened the package, I was a bit dismayed. This brisket had the least amount of fat I have ever seen on a brisket. In previous times cooking briskets in the oven, it's the rendered fat that makes the brisket so tasty. I was a bit concerned. We will come back to this later.
This is the lean side.

This is the fattier side. Trimming is necessary while smoking meat. If any fat is hanging, it will burn so you need to trim it off.

At this point, I am still very concerned about the lack of having a fatback.

In the next photo, the meat is 'aerodynamic' as the Mr. says. The smoking will go over the piece of meat evenly.

In cooking a Texas brisket, no rub is necessary. The only spices we will use are salt and pepper. The videos tell you to premix the salt and pepper. That way when you coat the meat, it will be even seasoning.

The experts recommend that you season the sides first.

Then, season both sides.

We wrapped the brisket in saran wrap and put it in the fridge overnight. The salt will help tenderize the meat.

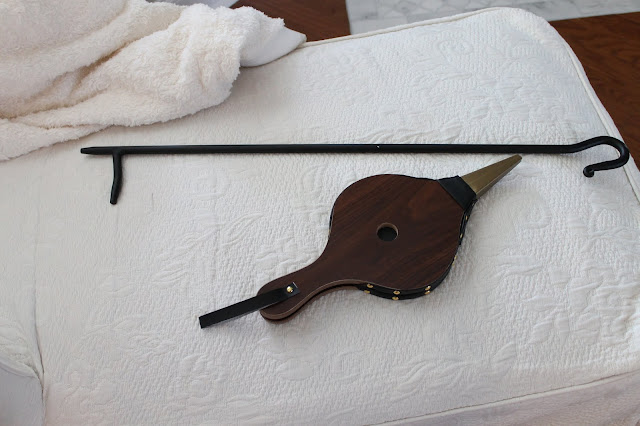
After we smoked the pork butt, we realized that we were missing 2 important tools: a set of bellows and a poker. I order both and had to laugh when we received them in the mail. The bellows was smaller than expected. It did work.

Like we did with the pork butt, spritzing the meat with unconcentrated apple juice. Don't worry, the juice will not add the flavor of apples, it will just add moisture.
The wireless thermometer was really a great idea. With it, you don't need to open the actual smoker so the temperature remains constant. It's a good thing. The heat resistant gloves are beneficial in handling the meat when taking it off the grill.

Another thing that really worked for us in making clean up easier was placing a wire rack under the hot coals and wood.

We also placed the water pan under the grill to catch drippings. The extra wire grate on top made for cleaning the grates easier.

The chimney was stoked and cooking was ready to start.

It seems like with pork butts, you want to get the fire to 250 degrees before cooking. The same goes with brisket.
When the meat reaches 165-180 degrees, take it off the grill, wrap it in a
double layer of heavy duty foil and return to the smoker and cook until the internal temperature is 203 degrees.

The brisket was removed from the smoker, wrapped in a double layer of heavy duty foil and put back on the fire until the internal temperature reached 203 degrees.
Once the meat was done, we let it rest remaining in the foil for one hour.
Here is the finished brisket after resting.

Once it was cut, the Mr. was thrilled that the smoke ring, something very important to smoking experts, was perfect. See the pink ring at the top of the meat. The ring was on all four sides of the brisket. Sorry that my picture does not show it.

I think if the meat had a more substantial fatback, it would have been juicier. However, with the amazing tasty juice, the meat was smoked and delicious. By the way, the glass bubble platter actually was a wedding present from my parents' wedding.

The next time we smoke brisket, I will make sure the piece has enough fat to render while smoking the meat. The other 2 full briskets have enough fatback, so they will be the next ones to smoke.
While trimming the larger pieces, I will cut a slab of the fat prior to smoking and place it on the remaining smaller brisket before smoking.
Don't be disheartened about smoking meat. It was so much easier to smoke meat the second time around.