Monday, September 28, 2015

DUNCAN PHYFE SQUARE TABLE-PART 2

 
I can't believe that it was back in February that I introduced you to my free Duncan Phyfe table.  With the painting going on, I hadn't gotten back to this project. 
 
The first major step was to fix the crippled table.
 
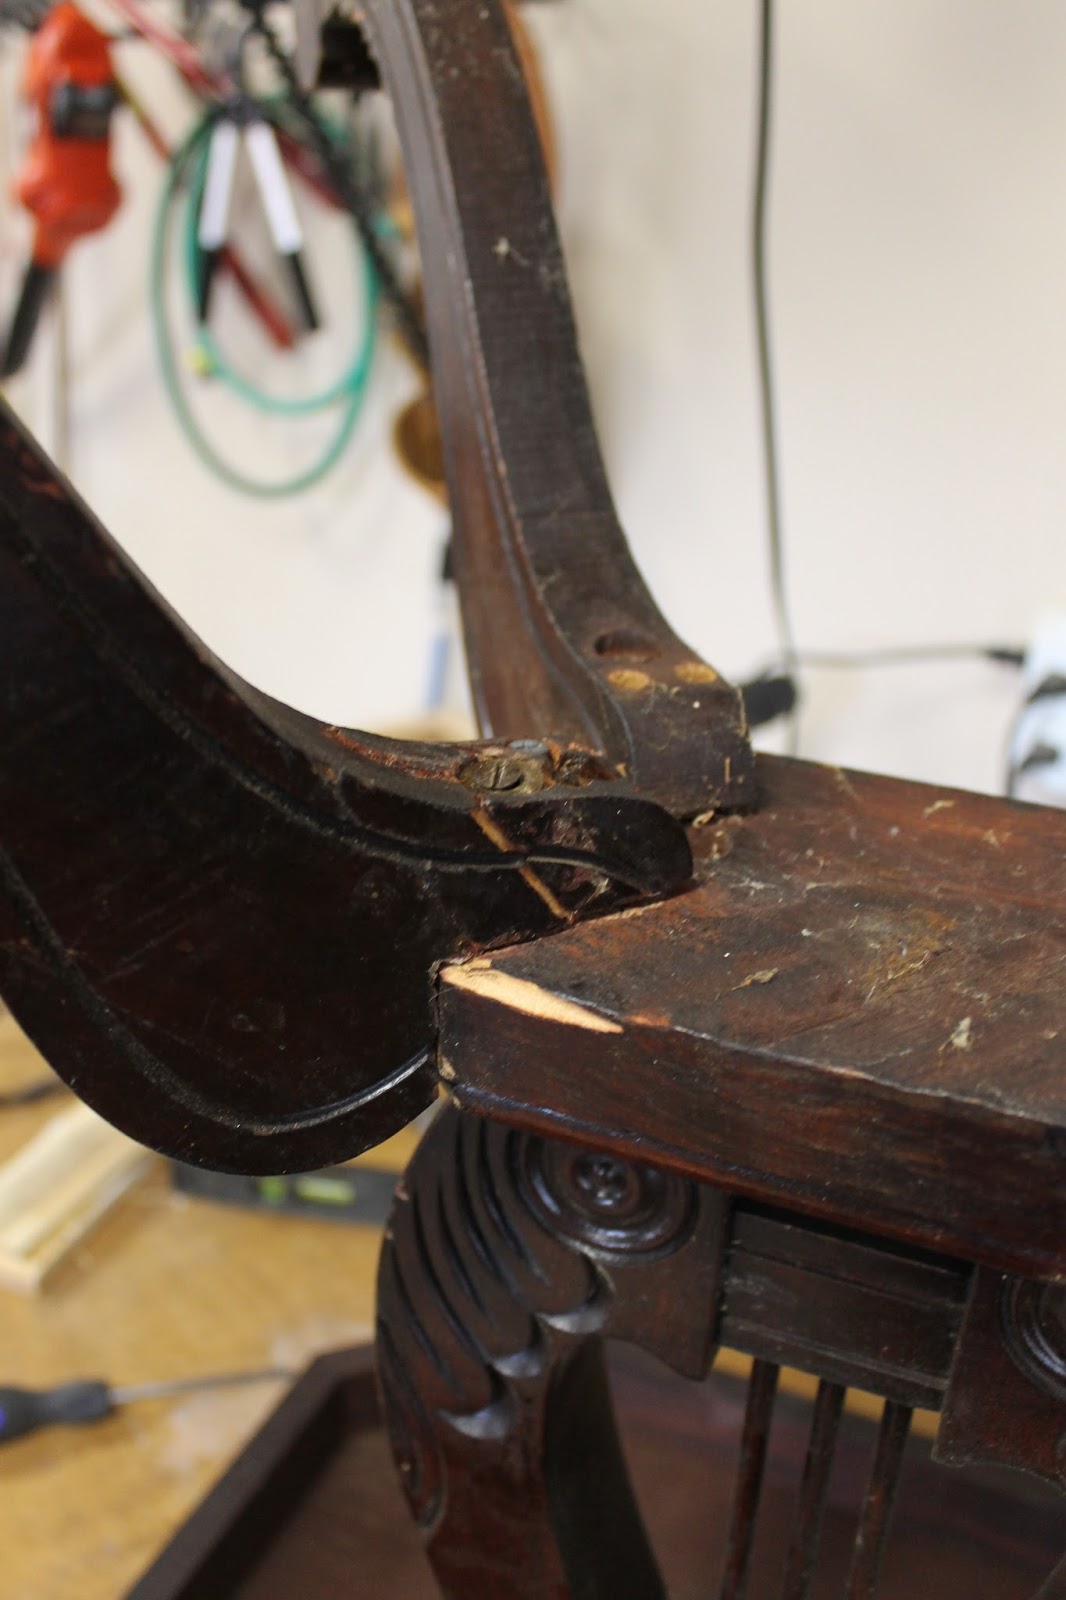
This is a picture of the fractured table leg.


When Mr. Thrifty first looked at it, he said that he would have to recreate the leg again.  I knew that would take a long time.  After a long discussion, he decided to drill 4 pilot holes and hammer 4 small nails into the end to give it more stability.  We glued the piece and waited overnight for it to dry.
 
The next day, it looked really bad, but I knew that with a lot of added wood putty and much more sanding, I could make it almost perfect.  After sanding the whole table, I could get it back to where it once was.
 
 
The front of the leg looked much better now before screwing it back to the table base.


Though still imperfect, I knew that I could completely mend this piece.  


The paint will cover up a multitude of sins.


Once we stood the table upright, it was very wobbly and not level.
 
Mr. Thrifty went to the wood pile and got a piece of oak out, cut them down and proceeded to secure them to the underneath of the table top.
 

Now it was very stable.


Once we set the level on it, we turned the table upside down again.  One leg had a metal cap on it.  Once that one cap was removed, the table was level.

 
Now I need to decide on a paint color and finish up the table.  You will have to wait a bit longer before she is completely finished.


Thursday, September 24, 2015

FALLL DOORWAY DECORATION 2015

Trying to bring some attention to the fall season, I made a quick door way decoration using supplies I had on hand.

 Some heavy duty packing tape,

some faux pumpkins,


a fall garland, cut in half,


some newspaper,

a dollar willow basket purchased from a thrift store,

and some filler.


First, I scrunched up some of the newspaper and filled the bottom of the basket.


Filler was added over the rumpled newspaper.


The pumpkins were placed on top of the filler, using the tape to secure them a bit.

The last step was sticking the garland into the back of the basket.  Voila!!!

What a quick way to freshen up the doorway for the beginning of fall.


Monday, September 21, 2015

FLEA MARKET SURPRISE-OAK TABLE AND FREE PLATE

While taking my 'Little one' out practice driving one Sunday, we came upon a flea market not far from home.  Because my daughter loves flea markets as much as I do, she begged me to stop.

The first booth had multiple pieces of vintage furniture out in the grass.  Getting closer to the booth, I spied a beautiful carved oak square table.  The intricate carvings on the legs were spectacular.  Normally when I find an interesting piece, I try to visualize where I can put it in the house.  I had no place to put the table.

After approaching the booth owner, I inquired about the price on the table.  He mentioned that he had just bought a storage unit of a deceased individual that had not kept up payments on the unit.  How sad was my first thought.  When he asked me if $25.00 was reasonable for the table, I was shocked.  The piece had it's original finished on it.  This was one of those pieces that I just couldn't pass up.

Look at the curved, carved leg.


The details in the table apron were just as appealing.


 The top of the table had no visible scratches or marks.


As I paid for my purchase, the owner asked me if I was looking for any other particular items.  I told him that I collected chipped vintage china.  He walked to a section in his booth and pulled this piece out.  Though dirty, he showed me the plate.  It would be perfect for my china mosaic projects that I occasionally do.  The price--free!  I couldn't pass that up.


When I returned home with my finds, I immediately washed the filthy plate.  I'm sure this plate will become part of a future project.

Considering that we were just out for an afternoon drive, I think I hit the jackpot.  I will be frequenting this booth on the weekends from here on out.

Thursday, September 17, 2015

ELEPHANT(ALABAMA) JEWELRY HOLDER FOR COLLGEGE COED


I  am excited to share a project that my college bound daughter made for a friend that will be attending Alabama this fall.  Because the elephant is the Crimson Tide mascot, she wanted to incorporate the elephant into her design.

After purchasing two plastic elephants at Michael's, she spray painted them silver.  Her plan was to design a jewelry holder to hang on the wall.  Mr. Thrifty helped her in completing this project.

Here is a picture of the elephants painted.


The next step included sawing each of the two elephants in half.  Getting a piece of scrap board out of the garage pile, she cut, sanded and painted the wood base in Annie Sloan Paris Grey.

Measuring the placement of the now 4 elephant pieces onto the  board was done.  After Mr. Thrifty showed her how to drill the holes, she made the 4 holes on the board.  On the back, she recessed the 4 holes so the screws would not stick out.


 Looking at the profile of the rack, you can see how jewelry could be hung.


The completed jewelry holder will hold multiple pieces.


I am thrilled that my daughter came up with the concept and basically created this beautiful, lasting work of art.
ROLL TIDE

Sunday, September 13, 2015

FALL MANTLE

You might recall that I left my summer mantle up the entire summer.  Now, with the girls back in school, it was time to change the season in the house too.
I decided that since I really liked the rustic window leaning up against the mirror, I would just switch out a few items and call it a day.  This transformation  is very natural and serene.  I hope you like it too.
Let's get started.  After taking down the gathering basket with voluminous blooms and the basket hanging from the window handle, I was ready to transform it into Autumn.
  
 Last summer while visiting colleges with my daughter, we stopped at Nell Hills.  I found this wonderful willow basket.


Because it is autumn, wheat seemed to be a great filler.  Hobby Lobby carries these packs of wheat.  I purchased 4, but used only 3 packages to fill the basket.


The basket was hung on the vintage window frame latch.


I also pulled out a garland that I found on sale last year. 


A few suitcases were added to the mantle.


Opening the garland and cascading it across the mantle completed the mantle.


Something was still missing.  A few larger baskets were placed in front of the fireplace.


The natural tones of the items placed on and under the mantle keep the scene very serene.

It will be easy to add some punches of orange and black to transform this mantle for Halloween.

Thursday, September 10, 2015

FALL FOYER 2015

In my previous post, I showed you the unique, antique birdcage that I was given by a dear friend.

To bring a bit of fall into the foyer, I carted out my tub of faux gourds.  The smaller ones could fit through the door of the birdcage.  However, many of them were just a bit too wide to enter the portal.


Not wanting to harm the birdcage, Mr. Thrifty thought that he could remove the top.  He took a scraper from his garage tools and gingerly lifted the top of the birdcage off the top.  Because it was nailed together, we can put the top back on and secure it later.

The oversized gourds now are able to be set within the birdcage.


With a few added items, the display takes shape.
We have the wool tartan plaid....


the larger pumpkins.....


and some faux greenery.


At dusk, the lamp adds just enough ambience to the foyer.
I hope Brenda feels that I have done her vintage birdcage justice.  This is just one of the many ideas that I have for this unique piece.