Tuesday, October 29, 2013

HALLOWEEN BIRTHDAY CARD THEN SOME....

 Crafting homemade cards is one of my most favorite things to do.  I call it my therapy.   Every year, I have two special friends who have birthdays around Halloween.

I found this cute witch image on Graphics Fairy(I think?).


 This image would be the centerpiece of the birthday card. 

I had some great black fancy fabric trim and a broomstick from Jolee's dimensional stickers.
 
 After cutting out the witch image, I glued her on two different fall scrapbook papers.  The trim was glued onto the skirt.  The broomstick was glued onto her right hand.


 A spider web was placed in the corner.
  
 
 What a great way to send a bewitching birthday message to your  October birthday friends!


Look what I received in the mail today!  Yes, a gorgeous handcrafted card from my dear friend Susan. She knows how to brighten my day.
Thanks Susan.


Happy Halloween


Thursday, October 24, 2013

HALLOWEEN FOYER 2013


Initially, I wanted to create a serene fall setting in my foyer with my cream colored porcelain pumpkins.
 
Anyway, once I had this scene established, I wanted to add some spooky elements to the mix.


One crow, and .....

 
and then a few more.
 
 
A creepy Dollar Store tombstone....
 
 
and a black iron twine holder......


And together with a floor spotlight, it became a rather spooky entrance into the house.


I'm ready for the trick or treaters!


Tuesday, October 22, 2013

FALL MANTLE 2013

 
Here is the rustic bead board door that I rescued out of the trash last summer.
Added to it was a burlap wreath made with textural pumpkins and acorns.


Once I had the inspiration for the fall mantle, there was just the matter of pulling rustic items out to fill in the space.


I pulled my wicker baskets out to set on the mantle and on the floor.


An old sewing machine double drawer fit in nicely.


A $5.00 estate sale chair with a cracked black leather seat added another level to the vignette.  After the season, this chair will get an overhaul.  Notice the intricate design on the chair back.


A few more pumpkins are scattered around the chair.
 

At night time, the light glows to make the room feel cozy.


Below the mantle can be as crucial as the impact of the mantle itself.  The idea is to create a full effect of the entire fireplace space.

 
More pumpkins are added to the mantle shelf.


Who would have thought that a tossed away bead board door laying in a heap of garbage would transcend into the making of a beautiful rustic fall mantle?
 

Wednesday, October 16, 2013

SCRAP BEAD BOARD BACKDROP

There is a cool back story to this posting.

Two summers ago, while in the Chicago area visiting my sister Karen, we took a morning walk before the heat became unbearable.  It just so happened to be garbage day in her neighborhood.

After walking a few blocks, we turned the corner and I noticed a pile of refuge up ahead.  My scavenger instinct kicked in.  My eyes focused on an old bead board door that must have gone to a cabinet.  I grabbed it.  I looked at Karen and asked her if she wanted it.  She wasn't sure what she could do with it.

  I didn't have a clue what I was going to do with it either, so I took it back to Huntsville to wait for the perfect spot to show off its unique coloration.


Here is the back of the door, beautiful in all it's chippiness.
I think either side would be perfect for a backdrop but on this project, I wanted to accent the rust and green of the front of the door.
  
 
I'm thinking that the white side of the door would look fabulous with a pair of vintage ice skates filled with Christmas greenery.  But that is another post.
 
 
 The rich browns, gold, rusty copper and gray- green paint chips lent themselves to the colors of fall.  To some, this worn torn door would be not worthy of resurrecting. 
 
For me, this piece was perfect to build the autumn mantle around.
 
 
 Once I had made my burlap wire wreath with glittered pumpkins and acorns, I knew I had a home to rest the wreath.


Just wait until you see how this bead board door became the centerpiece for the Fall Mantle 2013. 


Saturday, October 12, 2013

VINTAGE WEDDING CERTIFICATE TURNED COFFEE TABLE TRAY

Getting ready for fall was a challenge coming up with a new twist on the next season.

  What goes better with all the autumnal colors?  Why gold! As I was searching my collection of vintage frames, I came upon my Grandparents original marriage certificate in a gold distressed frame.  In the past I have used this framed certificate in a wall display of  'all that is Roth history'.  Between framed Naturalization certificates, to Baptismal certificates, with sepia photographs of those who gave us our identity graced the wall in our guest room.

 
The beautiful engraving still maintains its luster.(Sorry about the glass glare.)


Notice the wear of the frame itself.  I think it's in pretty good shape considering it is 96 years old and has gone through multiple moves with us.
 
 
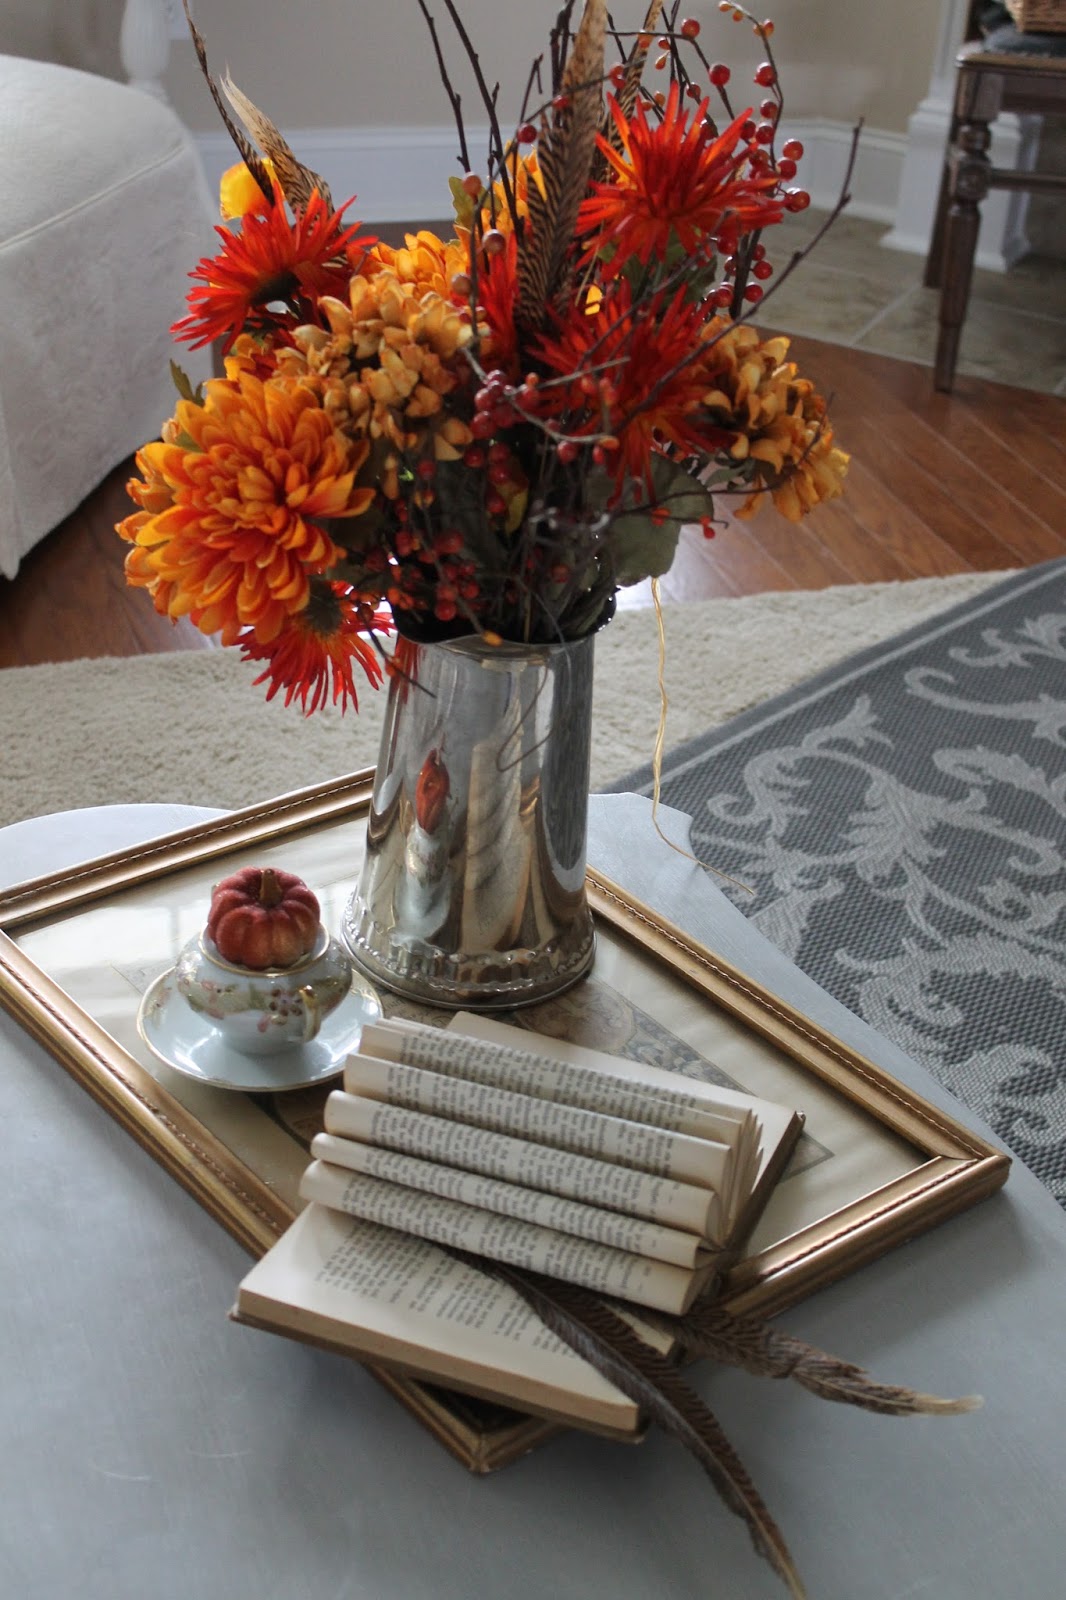
Instead of hanging the picture, I thought it would be a unique tray for my coffee table vignette.
 
 
Then, I thought of an old German book that I bought at the library book sale last year for 25 cents.  Recalling that my Grandfather was  of German descent gave me an idea.  Why not curl the pages of the book on the tray?  I realize that many would find that to be a very disrespectful thing to do to a book.  I promise, just this one time.
 
 
More folding........
 
 
The strange thing is that my youngest daughter comes into the room and mentions that that's what some of the kids in her class do when they are bored.  Out of the mouth of babes.  Of course, I inquired if she had ever done this, and she replied no.  I certainly hope not.
 
 
A few pheasant feathers and......
 
 
All that was needed was to insert some autumnal colors onto the tray.
 
 
Pulling out a tin pitcher that I have used repeatedly(it doesn't have to be polished), I added a bunch of my faux autumn flowers.  A raffia bow is added to the handle.
 
 
Two weeks ago, I picked up this little tea cup with attached saucer at the Mission Mart.  It was $1.00
before a 30% discount.  For 70 cents, I had to make a good home for it.  Adding a embellished pumpkin finished it up.


So on those nights during the fall, when I cozy up on the sofa to watch TV, I can glance down and smile thinking of my Grandparents.


Try using a vintage family certificate in your fall decorating.


Wednesday, October 9, 2013

SMALLER AUTUMNAL WREATH FOR MOM

Originally, I was making an autumnal wreath for Mom's door.  Once I hung it on the vintage mirror, it looked too large for her door.

 
On a return trip to Hobby Lobby, where all of their autumn picks were 40% off, I purchased two springs of gold  berries, a smaller wire frame and one glittered pumpkin.  Using leftover burlap, from the runners, I cut strips about 3 inches wide, and wrapped the frame.  I forgot to take a picture of the wreath when it was finished.  I will send a photo later.  Sorry....
 
 
Here is the smaller wreath completed.


 This photo was taken by my sister, Merri.  Thanks much.


Saturday, October 5, 2013

AUTUMNAL WREATH FOR MOM

Once Mom moved into her senior living apartment, I was given the job of keeping her front door attractive with some sort of decoration for each season.  You might recall the summer blooming wall pocket that was the first of many door decorations.

 
With fall approaching, it was time to create an autumnal wreath for door.
 
So let's get started.
 
Off to Hobby Lobby to purchase the supplies.  Burlap ribbon would fill the base of the wreath. 
 
 New wire wreath bases are now available and come in various
 sizes.  These bases make it very easy to gather ribbons of any kind into the frame.  My frame is about 15 inches in diameter.
 
 
With a 40% coupon, the frame costs about $1.80.  All of the other decorative ornaments except for the ribbon were 40% off too.
 
 
 This type of ribbon comes in a multiple of designs, colors and weaves.  Check them out at your local store.  The ribbon was 50% off the regular price.
 
 
Following photos are of the particular picks that I chose for the wreath.


As you look at the items, you see that I tried to compile various textures.
 
The first step was to weave the burlap in and out of the wire frame.
  
 
After wrapping the entire frame, I still had about 4 feet left.
 
 
 Using the entire 15 feet of burlap ribbon, I had enough to make a bow and still have a very long sash.
 
 
I cut the loop and left the ends with a v-shaped slit.


 A glue gun was used to attach the picks to the frame.
 
 
The back of the frame shows the excess glue which isn't too pretty.
 
 
And the finished product......................


This wreath will carry her into the early days of the wintry season.
 
I believe the size of this wreath is too substantial so I am going to make one smaller for Mom on the next posting.