Saturday, June 27, 2015

PATRIOTIC POTTERY BARN PILLOWS

The summer is just flying by.  I would like to share a project that I completed over the winter for you.
So let's get started.

When I picked up these Pottery Barn napkins on clearance, I knew what  I could make with them.


Creating pillows with 2 different fabrics coordinate and give two different looks for the summer couch.


I always look for pillows at the thrift shops.  I then throw them in the wash to give them a good cleansing.  These two pillows were both 16 inch squares so they would work perfectly with the standard size Pottery Barn napkins.


I pinned them on the Buffalo checked sides which makes for even sewing.


With right sides together, I sewed right down the lines.


They can now be used with only the union side of the flag showing.....


or use both sides to show our patriotic colors.


Hail the red, white and blue!

Tuesday, June 23, 2015

PANSY PORCH CHAIR

 
My winter pansies remained healthy much longer this spring.  I figured that I could get a few more weeks out of them before planting my May-June annuals.
 
I pulled my rusty white chippy rod iron chair out of the garage and plopped some yellow and purple flowers in the pot.
 

I love the yellow striped petunias.


A chipped tea saucer was inserted in the soil to add a whimsical touch.


The heat has really done a number on them.  Even watering them every day isn't enough.


 With the heat we have been experiencing, these flowers will fade fast.  I am happy to tell you that I already have a replacement for them. 
 
You will have to wait and see.
 

Saturday, June 20, 2015

TOASTER CRUMB CATCHER


This is one of those short postings.  My friend Susan, who created this blog, was visiting and noticed my toaster on the counter top.  She said, "You should do this on a blog."  So here goes.
 
I cannot stand crumbs collecting inside my cabinets.  I had an extra plastic shoebox handy. 


 What if my toaster fit inside of it?  Sure enough it did.


Now, when I store my toaster in the cabinet, everything stays clean and no more problems.


Sunday, June 14, 2015

EASY DOLLAR GENERAL TACO SALAD

Every holiday and birthday, my girls get in the act and buy me some unusual kitchen item.  This Christmas, my youngest daughter bought me a Tasty Tortilla pan that she bought at Dollar General for $1.00. 
 I make a point of making a meal with these special gifts that the girls buy for me.
 
This was an easy meal.
 
 
The nice thing about this pan is that you don't even need spray Pam to make the shell.  That saves some calories.
 
The pan has a special non-stick surface.
 
 
I used the large flour tortilla shells.

 
Simply press the tortilla into the pan.
 

Preheat the oven to 375 degrees.  Bake each shell for 10 minutes.  The minute it comes out of the oven, you can remove the shell and repeat the process.
 
The great thing about these shells is that you can make them in advance.
 
Meanwhile, while at home cleaning out Mom's house last summer, I spied these beautiful Mexican serape table runners and napkins.  They were given to us by Mom's cousins from Albuquerque.  They are made from stunning colorful wool.  They would be the perfect backdrop for my Taco Salad dinner.


The day before I made a batch of chili.  Using my estate sale clear glass bowls at .50 cents a piece, I gathered all my ingredients into them.(except the lettuce)


I assembled them starting with the salad greens.  Fritos and Ranch salad dressing were served on the side.  When your dinner guest is almost finished, they can even break up the shell and eat it.

 
What an easy make ahead luncheon or dinner salad! My daughter was so pleased that I used her gift.  Nothing shows appreciation more than to pull out that special kitchen implement to make dinner.
 
    We will be having many more of these at our house.


Wednesday, June 10, 2015

HARRY POTTER STYLIZED LUMBAR PILLOW

 Here is a quick 2 hour craft project.
 
My graduating senior came to me and asked about a birthday present for a friend of hers that loves Harry Potter.  A pillow would be a quick present to put together--hmmmm.
 
It took about 1 minute for me to sketch my idea on paper.  I liked the glasses but didn't like the temples.  I had to laugh at my senior.   My daughter couldn't figure out my sketch at all. 
 
 
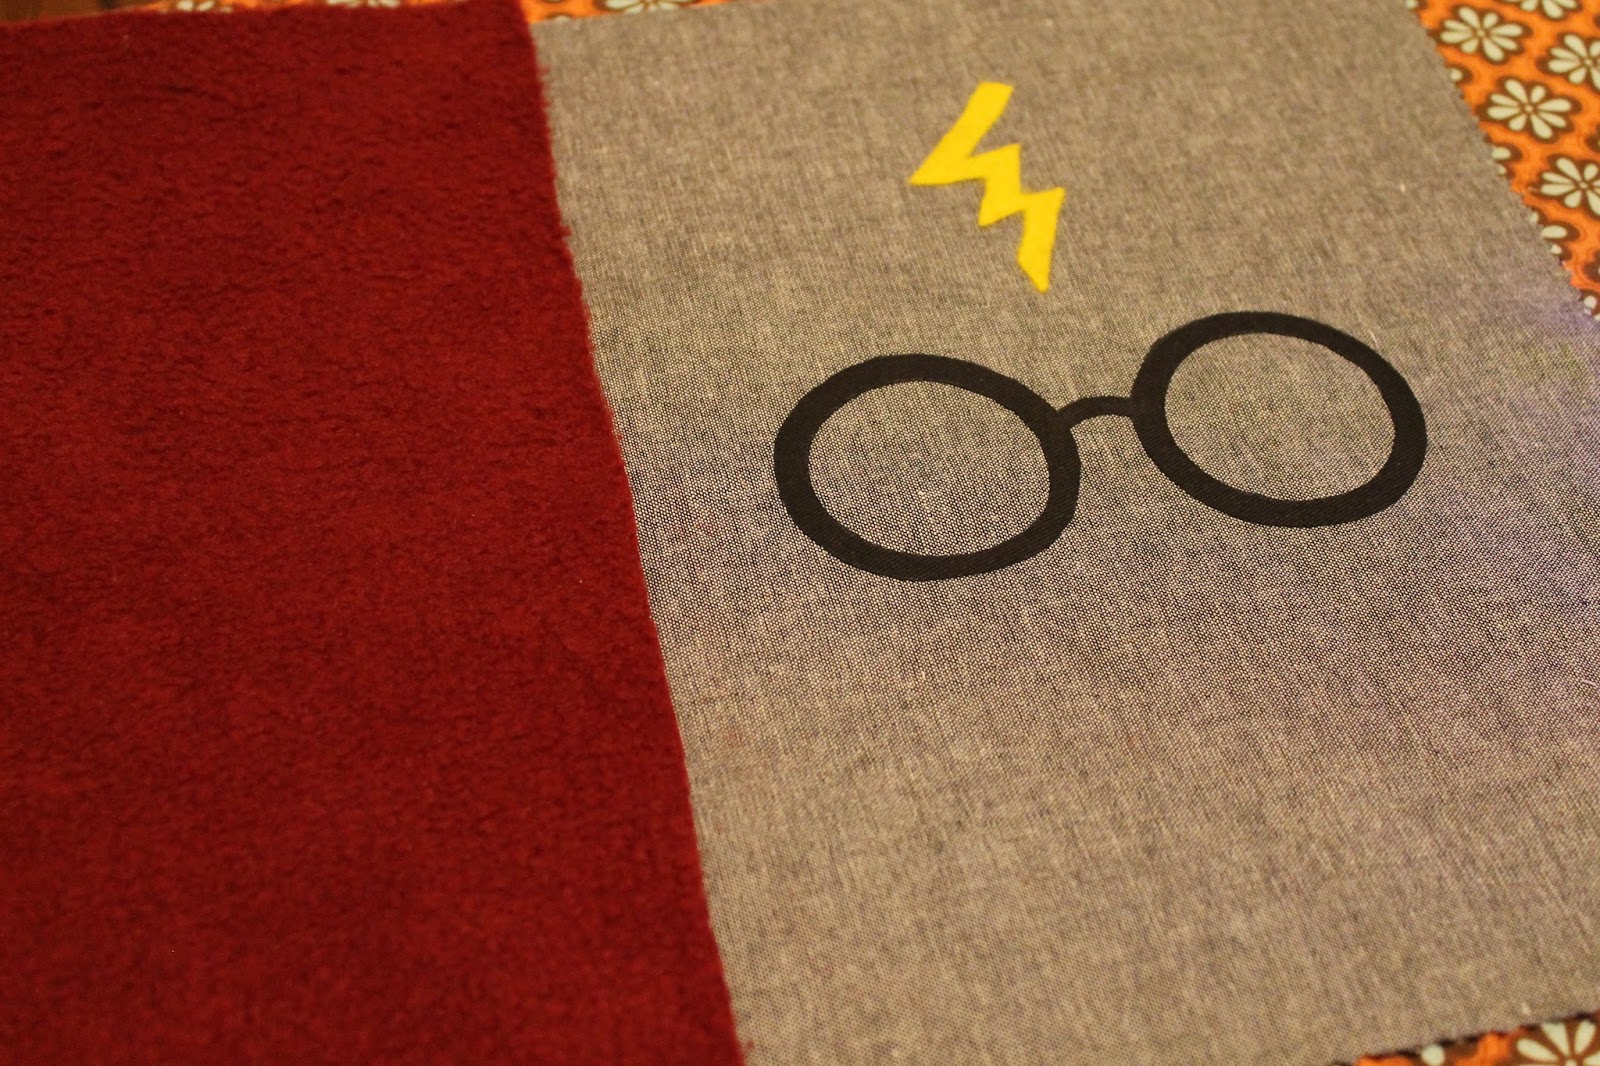
 I asked my daughter to Google-Harry Potter glasses and this is what came up.  Loved it!!  And it even had his scar.
 
 
  We jumped in the car and headed to Wal-Mart. 

The first item I put in my cart was the fiberfill to stuff the pillow itself.


The next item on my list was a gray fabric for the pillow itself.  This fabric jumped out at me.  It was a simple gray cotton material.  I bought a half of a yard of fabric because by the time I really got into my quest, my daughter asked if I could make her one too.  How could I say no?


To mimic Harry's scarf, I began looking for a wine colored fleece.  I thought that the variety of textures would really be fun to incorporate into this project.  The store didn't have any, so I went looking for my next material to create his glasses.
 
 
By this point I was flying down the aisles to find a black material with adhesive.  I stopped at the patches and knew that I had hit pay dirt.  They remind me of the days when Mom would have to patch my brothers' pants because of the holes in the knees.  The fact that there were 2  patches in the kit was a bonus.(2 pairs of glasses)
 
 
The last item I picked up a piece of yellow felt to make Harry's scar.  For 23 cents, this was the perfect material.
 
 
 We paid for our items and then headed down the street to find the burgundy colored fleece.  We weren't in the store but 2 minutes and I had found the perfect color-wine.
 
 
With 30% off the fabric, a quarter of a yard cost $1.75.  This project was a very economical deal for all the materials needed for the pillows.  For about $5.00 minus the stuffing, I was able to make the two pillows.
 
Once we arrived home, I went to the spice cabinet and pulled out a jar and a juice glass to trace the glasses on to the back of the patch.  First, I traced around the juice glass.  Then, I traced the spice jar lid into both circles.  The material cut very easily.
  I also cut out 2 yellow scar patterns out of the felt.
 
 My daughter cut the glasses out and they turned out perfectly.
 
 
It's coming together.  Now I had to figure out how to attach the fleece scarf material to the pillow.
 
 
The glasses were attached using the iron.  Remember to turn off the steam element on your iron.

  I used fusible bonding webbing on a roll to attach the yellow scar.

 I sewed the top of the fleece to the top of the front of the pillow. I then sewed a seam across the bottom of the gray fabric so the wine fleece could be attached in two places.  The bottom seam was sewed about one inch from the bottom of the gray fabric.  You will find out soon why it was important to do this step.
 
 
I then put right sides together folding the  fleece up so it wouldn't be sewn into the bottom seam of the pillow.  Once inverted, I cut the fringe at the bottom of the fleece about 2 inches up.


Can you see where the 'scarf' is attached at the bottom?

 
Once the pillow was stuffed it was finished.
 
 
When both of them were done, they were not exactly the same size.  The pillow on the right has the glasses a bit too far to the right.  The placement on the left pillow is perfect--until my daughter tells me that the scar is upside down.  I was afraid that if I tried to remove the scar, the fabric would tear.  She said it was fine and to leave it be.
 
 
I hope the two of them enjoy their new pillows to use on their dorm beds.  Another use for the pillow could be that the kids can slide their cell phones under the scarf and it will remain somewhat secure.  You know these kids cannot be far from their cell phones!
 
So another project completed.  I could use the same idea on future gifts.


Saturday, June 6, 2015

WE ARE BLESSED

 
I apologize for not keeping up with the postings for the past few weeks.  Life changes have interrupted the flow of this blog.  But those life changes should be the more prominent  than the day to day ramblings of my voice.

It was a joyous occasion to have my sisters visit from afar to witness our first high school graduation.  As wonderful as that was, then came the moment that we found out that Mom had died

.  I am so glad that I wrote the Mother's Day post about Mom a few weeks ago.  She was getting so tired.

So with the graduation winding down, we prepared ourselves for the journey home to put Mom to rest, commune with siblings, cousins and friends near and far. 

After a beautiful celebration of Mom's life, I come away with one very important thought.  Family is the connection that will bind us tighter than all other relationships.  We will lean on and hold up our family members just because they are family.  I know Mom would  be thrilled to hear that.  She instilled in all of us to be grateful for all that we were given. Her sense of being the listener who consoled others seemed to come easy for her.  She was Mom.

 Coming away from those two days, our connection was the strongest than it has ever been.  From this day on, we will be there for each other through thick and thin.  You see, we have been given a great gift--family.  It is a beautiful thing.

Thank you Mom.  We love you.


Image from Graphics Fairy.