Sunday, June 23, 2013

COFFEE TABLE SETTING WITH TOILE BOOK COVERS

Because all of the blue and white porcelain is display in the Great Room area, it was time to channel a bit of it to the coffee table.

Last year I bought a roll of cobalt and cream  toile wrapping paper from Tuesday Morning. In order to incorporate a bit into the coffee table setting, I covered two of my books with the wrapping paper.


I am probably dating myself to say that I learned this technique from the nuns at our Catholic grade schools using grocery bags.  I recall laboriously making all the folds and creases exactly perfect.  My high schooler still brings her textbooks home to cover them the same way.


Look inside at the glorious artwork right inside the cover


My young peasant woman bust blends well with the recently updated Paris Grey coffee table.  The faux cement heart unifies the tray. The added cobalt blue binding from a $1.00 library book sale compliments the wrapping paper covered books.


Laying a  vintage frame with a mirror insert on the table unified the setting


JUNE PICNIC- MANTLE OF BLUE AND WHITE FINE PORCELAIN


By now I think you have figured out that I love blue and white china porcelain in my great room.  I love the way you can compliment it with white, pink, and orange accents.

To add a whimsical edge to the  display and it being June, I combined picnic baskets and silver plate serving pieces to the mix.  The collection of porcelain was started when I married Mr. Thrifty.  He had purchased the first pieces as a military bachelor in Germany.  The rest of the pieces came from estate sales and garage sales over the years.


 What a luxurious jaunt for a picnic accompanied by a wicker basket full of silver engraved goblets and trays to eat your lunch.


All that is needed is a quilt to spread out for the picnic spread and homemade picnic food items to fill the basket.


COMPOSTING BIN


Last year I received a cylinder type composting bin.  I loved it, but realized that it took a long time to make the compost and at most  the finished product was about 10 gallons of 'black gold' as I call it down South.  The red clay soil needs serious attention in order to grow plants and this compost does the trick.

                              That doesn't go very far when spreading in the flower beds. 


The only other option was to create one.

Last November on a rainy Veterans Day, Mr. Thrifty had the day off, we decided to go out and find free  wooden pallets.  Because there is such an interest in up cycling pallets into furniture, businesses are not charging for the pallets.

Our last hope was stopping at the Glidden paint store.   Success!!!!   In the pouring rain, we found 6 pallets in great shape.  Here they are loaded up in the car.


 Mr. Thrifty hauled them to the backyard the following weekend. 
He tacked extra boards to the base so the compost would not fall through.


After nailing the sides on, he took a heavy duty piece of twine and made hinges on one side of the front door. 


Then, the autumnal leaves and green grass clippings went into the bin.  Not all of these bags went in at first.  Over the winter and spring, leaves, and bone meal were added to the mix.  Mr. Thrifty tried to turn the matter at least once a week.  It is important to keep it moist, so as the Mr. says, 'it can cook'.  I have to chuckle. 


What is so great about hinging the front, is that you can easily open the door, and  use a pitchfork to turn the contents of the bin during the week.  Close the door back up for the next week.


By the beginning of this past April, the Mr. had unloaded 5 wheelbarrows of the richest compost seen in these parts.  He spread it around the newer flower bed on the hill. 

The plants are thriving beautifully.  They love it.  Besides all the nutrients put back into the red clay, the thick layer of compost keeps the moisture around the roots to allow better growth.


The whole process was started again. Besides the raked leaves, bone meal and green grass clippings(nitrogen), I add onto the heap daily my vegetable peelings, coffee grounds and rinsed egg shells. 

Looking back, my dad composted forever and ago.  We always teased him about saving  egg shells, corn cobs and remnants of any unused vegetables for his garden.  Unfortunately it took me years to achieve the wisdom that he really did know what he was talking about.  I know he's smiling up there in heaven knowing that I learned a bit late, that he was right all along.


TROPHY LAMP BASE TO PARIS GREY


I am in Illinois readying our home for the real estate market.  I am up to my eyeballs with fix it projects, and cleaning as the house was left in very poor shape.(thanks to a pathetic tenant)

I am going to load up the next few posts, so you won't think that I abandoned you.  Enjoy and I will be back in a few weeks.


Finding this trophy-like lamp base at an estate sale was a great find.  For only $25.00, the base was a great piece to try Annie Sloan chalk paint.  I have read that this particular paint could be used on metal.  This was going to be a challenging experiment.  The newer shade was bought at Target.


And a closer look of the base.


Wanting to continue the grey look in the great room to compliment the off white slipcovers was the beginning of this experiment.  I started with one coat of Annie Sloan Paris Grey chalk paint.
 
 
The  coverage was pretty good, but one more coat was necessary.  Then, one coat of white Annie Sloan paint was used to coat some of the bands of the base.
 
You will also notice that I began to distress the piece with a piece of 220 grit sandpaper.  After a visit to the store who supplies the Annie Sloan paint, I was told to paint the item two coats, then apply a clear coat of wax.  Then distressing the piece will give you more control of sanding.
 
 
Another coat of paint was applied.
 
 
Now, a coat of clear wax is applied.  It gives the piece a bit of sheen.
This great waxing brush is used with the clear wax.


Then I applied a dab here and there of the silver gilding wax.  


 Now the shade.......


Something was missing.  I grabbed some off white tulle ribbon and a vintage brooch.


Tying the ribbon around the shade gave it that extra oomph.


A future project will be painting the pair of urns to match this lamp and filled with spring bouquets.


Saturday, June 15, 2013

THRIFT STORE COFFEE TABLE

My youngest daughter begged me to stop by a  thrift shop that we had passed many times during carpool. 
  It was the first thing I laid eyes on walking in the shop.  This table was $37.50 and solid wood.


                                          Here is a close up of the top of the table.


                                    Look at the close up of the intricately carved legs.

 
                                  I also love the braided trim going around the top of the table.


This is what the table looked lightly sanded with all imperfections filled with spackling compound.


I am going to give the whole piece two coats of Annie Sloan pure white paint.  I still haven't decided if I'm going to stencil the top or just add a coat of clear wax.


Getting a bit bored with off white and white furniture, I decided to go with 2 coats of Annie Sloan Paris Grey with sanding in between coats.


Using a water color brush, I used Annie Sloan Old White to paint inside the intricate carving of the legs.  It brought out so much of the detail.

Using 20 grit sandpaper, I knocked off some of the paint on the edges.  It is so easy to sand Annie Sloan paint.  You do not need much pressure to get the distressed look.


Once finished, I only waxed the top of the piece, using a clear wax.  When applying wax, it is easier to work in small sections.  As soon as your rub it on, immediately buff it out.  My mistake was waxing  almost the entire piece before starting the buffing process.  The wax becomes harder to buff the longer you leave the wax on. 

This next picture shows the richer gray as the wax is applied.


I left the bottom of the table un-waxed.  I like the idea of two finishes, the top having a sheen and the bottom, a matte-like finish leaving the piece subtle but distinct.


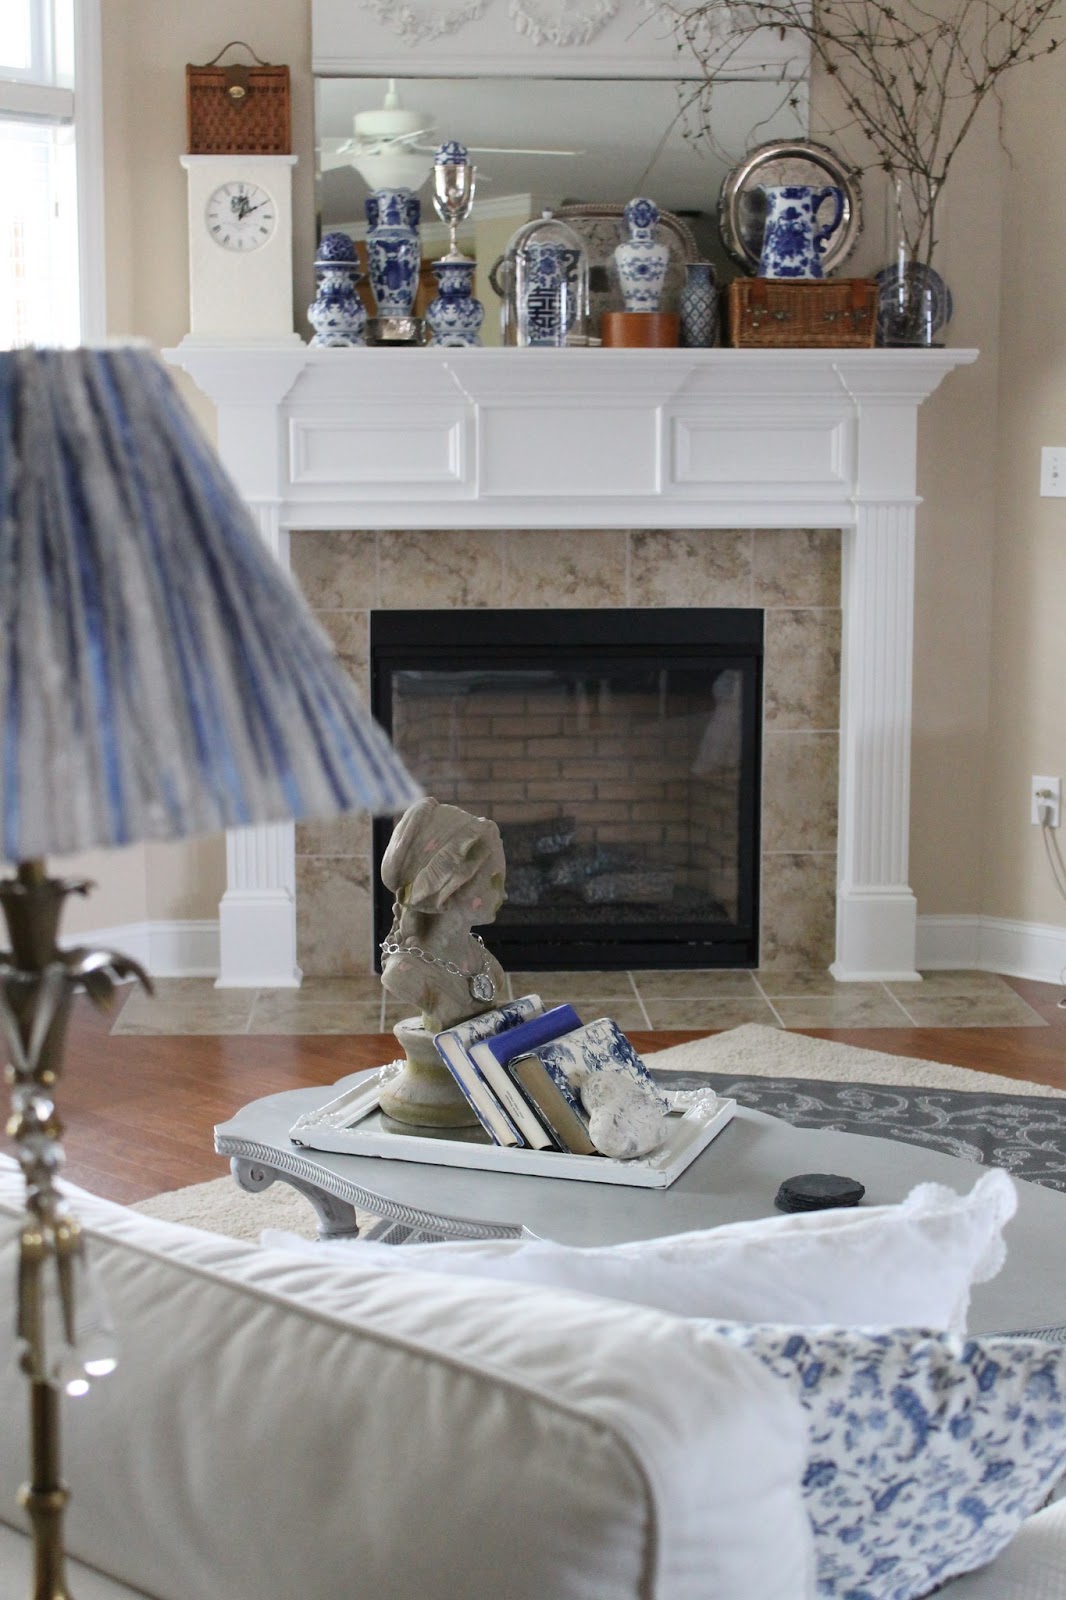
The completed table fits well with the ecru couch and matelassé slipcovers.
Notice the sheen on the top of the coffee table.


Layering an old framed vintage mirror with painted white frame, a few old books, my lady bust, a cross necklace by Tara and Maureen and some cobalt blue pieces complete the setting.

 
I feel relieved that working with the grey shades gave a warmer feel to the room.


Pink and grey look so calming.


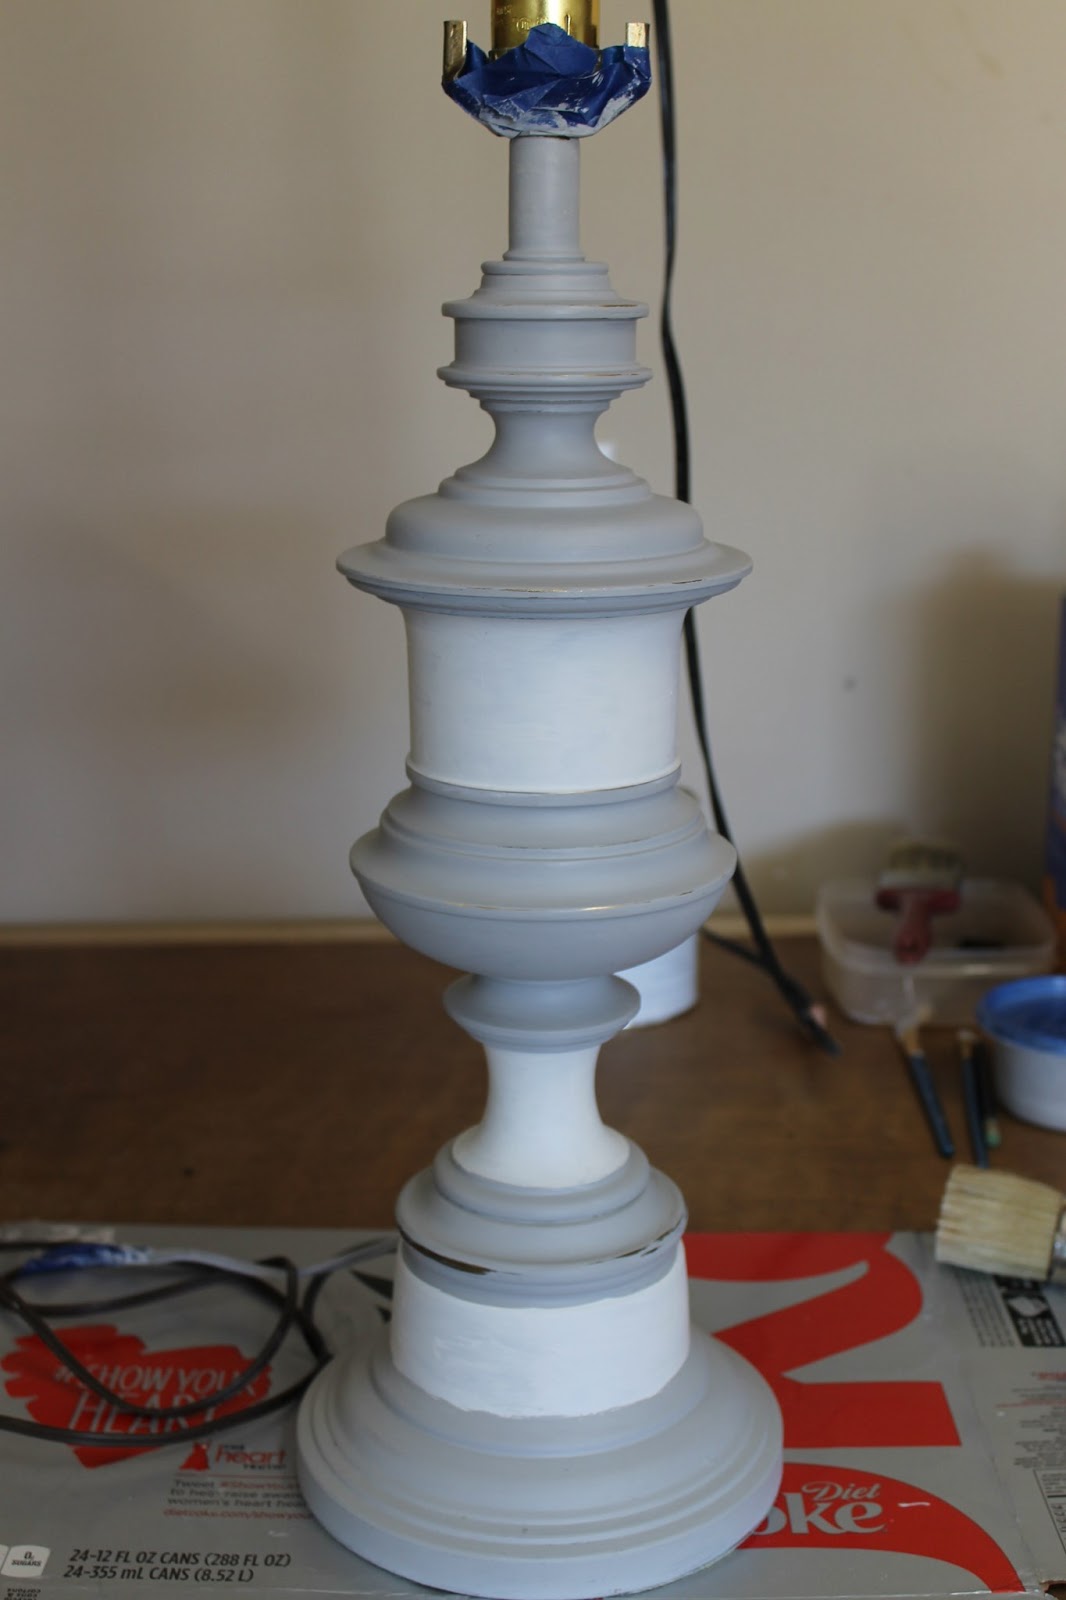
I'm anxious to try another project using the Paris Grey paint on a $25.00 trophy like lamp base.
 Stay tuned.
 

Tuesday, June 11, 2013

REFURBISHING A TIME WORN QUILT

I was thrilled with my find of 3 vintage, worn quilts  found at a neighborhood garage sale.  As you may recall, I bought the first two quilts for $20.00 a piece and the third quilt was thrown in free.  This was the one that was in desperate need of repair.  There was no binding on two sides and the other two sides were worn. It is shown thrown over the back of the couch.


It didn't look too terribly bad thrown over the back of the couch because I folded it in a way that showed the least imperfections.  The white binding that is blurry was very frayed.

Here is another view of the quilt. Thinking about all of the nimble fingers that worked to make such a masterpiece was absolutely the reason to rescue this vintage quilt.


My first thought was to buy a cute vintage like calico print that would compliment the existing fabrics in the quilt.  After searching for 30 minutes, nothing worked.  I proceeded to the seam binding section and found an almost match to the existing squares on the quilt.  The 30% sale price gave me a price of $l.29 per package.  I purchased the only three packages of the double binding that they had in the canary yellow and prayed for the best.  It had to cover the perimeter of the quilt.


For a total of $4.51 new life has been brought back in the time worn quilt.

Once home, I opened the package of binding, ironed them well and then sewed them all together in hopes of keeping a continuous band to finish the quilt.

Prior to attaching the binding, I had to trim off one entire side of the quilt. 


 The original top, batting and bottom pieces were shredding. 


More trimming


Because of the previous damage, one whole side was trimmed drastically.


To be honest, it isn't the prettiest sewing job I have done, but it was the simplest way to attach the binding.
 
 
In the end, the refurbishing of the quilt was well worth the expense of the project.  More importantly, more years have been added to this time worn treasure.