Monday, April 30, 2012

Chandelier I

This chandelier project would be the first of many that I would redo.  I found this item at the dump.
After removing the light  bulbs, I slid the yellow tubes off the stem of each arm.  These were cracked and I threw them away.  You can buy replacement tubes at a lighting and fixture stores.


The next step is to lightly sand the brass surfaces. I took paper towels wadded up and stuffed each of the light bulb holes.  Next, I suspended the fixture on a rope under a step ladder.


This is a different chandelier, but it shows my ladder set-up. First, I spray prime the piece and let it dry overnight.  Using the white appliance paint, I gave the fixture two coats of paint.

This unopened can was purchased at an estate sale for .50.    This product usually costs about $5.50.


The next step was making the shades for the lights.  I had some leftover off white silk in my fabric bin.   First, make a pattern of the shade and add 1/4 in. to both sides.  I used spray adhesive directly on the shade prior to laying the fabric over it.  The extra 1/4 in. on each side can be folded over the edges of the shade.  Using a glue gun, I glued an ecru beaded trim to accessorize each shade.

Chandelier crystal prisms were purchased online through a discount chandelier site:  spectrumhome3.com.  I bought 1 foot of chandelier crystals on chain.  This chain was broken into 5 equal pieces to connect the arms.  I did not buy bobeches because the metal ones already attached to the arms just needed tiny(5 per light) drill holes to attach the crystals.

Sewing a cord cover out of the remaining silk fabric was gathered on the cord before hanging.

The next blog will include changing out the shades and cord cover to give this chandelier a whole new look.

Friday, April 27, 2012

Converting a Dresser Mirror to an Earring Holder

When my first daughter had her ears pierced, I searched high and low for a tasteful earring holder for her dresser.

While walking in Hobby Lobby,  I saw this black ornate mirror.  I walked over to the easel aisle, put the mirror on an easel and the idea was born.  The frames were 50% off, but the easel was not.  I bought the frame and came home and put it in the project pile.  Days later, I was at Wal-Mart and looked in the picture easel aisle.  I found an easel that would fit the frame perfectly. 


Since the accents in my daughter's room were black, I spray painted the easel high gloss black.   I pried  off the mirror, which was glue gunned onto the back of the mirror.  Off to Home Depot to get a roll of black screen material used for windows.  I cut a piece of the screen and glue gunned it to the back of the frame.  Here is the result.


When my second daughter had her ears pierced, she wanted to go with a white earring holder.  Pulling some high gloss white spray paint out of my cache, I sprayed both the frame and easel.  This is the result.


No matter what the color scheme is in your daughter's room, you could use any color spray paint that you want.

Tuesday, April 24, 2012

Front Porch Column Bird Solution

When we moved to our most recent house, we had beautiful columns out front on the porch.


It didn't take long to realize that the birds wanted to take over our porch.  When I would go out to  get the paper, I found multiple piles of bird droppings.  It seemed that the birds had overtaken the columns and had nested at the top of them.  There had to be a solution.  Off to Home Depot to see what they had to remedy the problem.  To no avail, I came up empty handed.   Then my husband came up with an idea.  If we could make their perches non-friendly, then we would solve our problem.  Mr. Thrifty went to his workshop and cut 3 inch by 12 inch strips of wood out of beadboard scraps.  Then, he drilled multiple holes through the strip.  Finally, he drove short nails through each of the holes.


He made one strip for each of the columns.  When completed, he set the wood strip on to the top of the column.
  What you see from the back of the column is this.....


For some reason, the birds seem to nest on only the back of the columns. 

From the front, you can hardly see the 'tack strips'.


Last summer we placed these strips up and immediately the bird droppings were gone and no new nests were built. 

For any of you out there with the same problem, try our solution.
No more cleaning off the porch.


Saturday, April 21, 2012

The Easiest Window Covering in the World

My friend Susan just texted me a picture of a very clever window dressing.  It brought to mind one of the fastest, easiest window coverings ever.

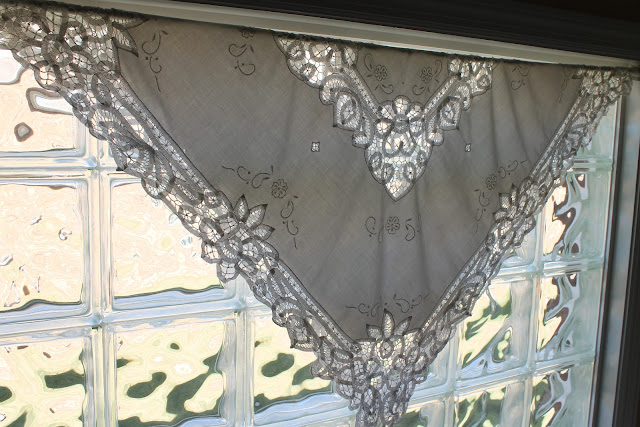
All you need is a square table topper.  I had an old Battenburg lace tablecloth in my pile of linens.  I pulled it out, washed it, and ironed it.

Next, you will  need to measure the distance  between the window jams.  Go out and purchase a small tension rod to fit the appropriate width. The last step is to fold your fabric on an angle and hang it over the rod.   No pins to secure it.  The weight of the fabric drapes over the rod.   I really like the look against the glass block window.


      Here is your answer to a 5 minute fix window treatment.  Dig through your linen closet today.

Thursday, April 19, 2012

Shabby Nightstand

While vacationing in Illinois one summer, I asked Mom if I could take a  vintage bedside table home with me to refinish.  This is what it looked after stripping and sanding.


I wanted to give it a coat with some sheen, so I used an oil based paint.  It is Olympic Premium        Exterior Oil Gloss.  I purchased it at Lowe's  The label color is WHITE-73710.

I have used this paint on most of my shabby wood projects.  It cleans up nicely with a damp rag and doesn't seem to fade.


                                    Originally, I used it as an end table in my living room.
Then, I decided that it would work better in my bedroom.


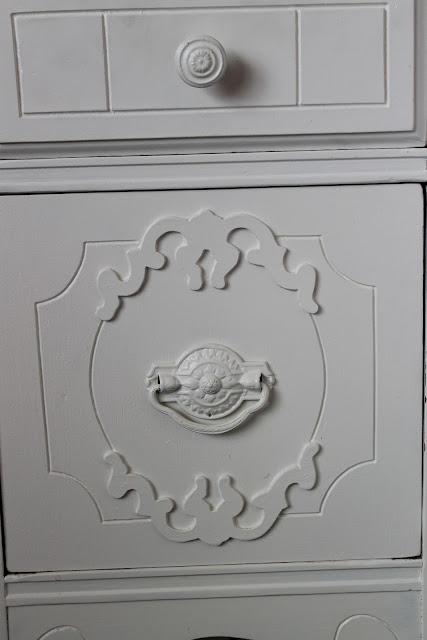
And a closeup of the front.

                                          I think it works well with the white headboard.


Monday, April 16, 2012

Vintage Copper Treasures

Years ago, I came upon a collection of copper at an estate sale.  I found 3 measuring pots and 4 copper tarlet pans.  I always liked the country french flavor in design, but I didn't know what to do with them.  After the move, I was unpacking what seemed like endless boxes of treasures.  Just like Christmas, I found the copper pieces  once again.

I was at Hobby Lobby one day and found these great frames for 50% off.  They were originally $25.00 dollars apiece.  I picked two frames and then pondered about what kind of mats to use with this project.  I knew that I wanted to display them with the Menu blackboard that I had just completed.


Months later, I was browsing at the King Cotton Fabric Store and looked at the sample  section.  In it, I found two matching  linen pieces--priced at one dollar apiece.  I knew they were large enough to fill the twin frames that I had purchased at Hobby Lobby.


This fabric definitely had that french flair.  I bought two adhesive backed foam core boards to fit inside the frames. Then, I attached  the linen to the foam core.  I had to figure out how to hang the copper treasures onto the fabric.  I pulled out some leftover cross-stitch thread out and carefully sewed all the pieces onto the corresponding boards, popped them into the frames and they were complete.

                                                             Here is a closeup of the frame.


                            The frame compliments the gold frame in the blackboard.


Here is the completed wall display.  I believe over time, the copper tarnish will enhance
                                   the frames and give it that  vintage look.


            It is possible to put a vintage(the gold frame)frame with brand new frames.  This is also  a                               unique way to show off special collections that you may have.

Thursday, April 12, 2012

Tea Service

It seems that the Easter vignettes were put away too soon, only to pull out the Spring items.  We are having cooler weather this week in Alabama, but it was welcomed after a few weeks of hotter temps.  Plants are growing outside and attending them everyday is becoming a scheduled event on my calendar.

I was looking for a wooden piece to create a spring arrangement.  I had this vintage silverware caddy in my stash for what seems like forever.  (As you can see, it has a $2.00 price on it.)


In the past, I have used these types of drawer to hold desk items.  (Future blog)  But, today, I wiped this piece down and started picking up stuff to fill it.   Since it had numerous compartments, I got busy. 

                  I pulled a stack of seed packets  and some miniature gardening tools out  for fun.


I have always collected vintage salt cellars.  These items were used in the day before Morton Salt  boxes.   Women would fill the cellar and leave a small spoon in it.  Before the doctors gave such a bad name to salt intake, each setting at a table had it's own salt cellar.


I found my Splenda packets and put them in a cute wire basket.  With Splenda, I needed tea cups and saucers.


And finally, I added the tea box.  With added silver and a few spring blooms, the arrangement was complete.

                                Time for Tea

Monday, April 9, 2012

Vintage sewing drawers to remote keepers


What does one do when they have vintage sewing machine drawers laying around?  I had the idea to make holders for tv remotes.  I don't like the clutter of the 4 different remotes in the living room. The drawer was a perfect answer.

The first step was stripping and sanding the drawer.  Before painting the drawer, I applied a coat of spackle to crack the top coat.  The last step was painting it with acrylic white paint.

 Now the challenge was to find a way to make cost effective knobs.  I looked on line and the porcelain hand painted cost up to $25.00.  I didn't want to spend that kind of money.  I found these plain wooden ones at Home Depot for about .59 a piece.  Quite a savings!

So, I began searching for ideas.
Here are some of the ones I liked from the Internet.


But, nothing really caught my eye.  Since I wanted to do a Blue Willow look, I pulled one of my Blue Willow plates out. 


I started sketching on a sheet of paper.  This is what I came up with.  It is a very rough version, but works fine with the blue white theme I have going on in the Great Room.

                                       To completely change the look, I tried to do a pink graphic.


Now the remotes have a home and I feel that I had conquered the clutter.


Saturday, April 7, 2012

Wednesday, April 4, 2012

Mosaic Hanging Cross

I was in Walmart a few weeks ago and found these almost 5 inch resin crosses in the stationary section.


They came in two different styles complete with a hanger on the back.  I knew this was the perfect venue to mosaic once again. 


Before priming and spray painting with white applicance spray paint, I removed the faux pearls that were adhered to the crosses.


I believe that the crosses with the removed pearl will be the easiest ones to mosaic.  We'll see how it goes......

The next step was arranging the mosaics on the cross.


Then, I taped off the edges so I wouldn't put any of the tile adhesive on the border.


Once the adhesive was troweled onto each piece, the crosses looked like this.  Then, let dry for 24 hours.


                                       Next, came the grout and it needed to dry overnight also.  Here is a                                                     picture of the back with the hanger.


My daughters got in on the act.  Everyone can make their own design.  I thought the crosses with the pearls would turn out better, but I was wrong.  I like the one with the draped cloth better.

                     The nice thing about this project, you can hang it or stand it up in a setting.