While enjoying the use of the rain barrel, we came into a problem. When we wanted to drain the barrel with the garden hose, Mr. Thrifty realized that the barrel was not high enough to send the water via hose to the front yard.
So, yes, another project revision was at hand.
When he gave me a cup of steaming hazelnut coffee at 6:37 a.m. on a Saturday morning in bed, I should have known something was up. I was up for this activity however I did share with him that carpool running would start at 9:30. Getting my work clothes on, I met him at the rain barrel.
You might recall the initial placement of the rain barrel last summer.

To begin building up the base, I hauled over leftover brick from the house. Adding the layers was fairly easy. Each level had to be offset for structural purposes. The electric Ryobi cutter went through the bricks like butter to allow for off centering of the layers.
Once all three levels went up, we used brick pavers left over from the retaining wall project last summer to fill in the void. After that, Mr. Thrifty surrounded those block with rocks that he had been saving digging up different projects in the yard. Using bulkier block and rocks saved us from purchasing them.


The leftover white rock(from the retaining wall) filled in the empty spaces.

As you can see, I am not doing much work except taking photos of the procedure.

Once the white rock was somewhat leveled, leftover pea gravel filled in the remaining spaces.

Leveling off the top surface was important.

For further stability, pea gravel was pushed into the brick holes.
A bit of side tracking... onto Ask.com. Why are there holes in bricks? Here is their answer.
Bricks normally have three holes to allow even firing. They allow a consistent heat distribution throughout the brick when it is cooking in the kiln, resulting in a thorough and even cure and provide a key way when filled with mortar locking one brick to the next. Holes in bricks also help to save up on building material needed in making these bricks.
Well, you learn something new everyday.

Now comes the pounding of the base.

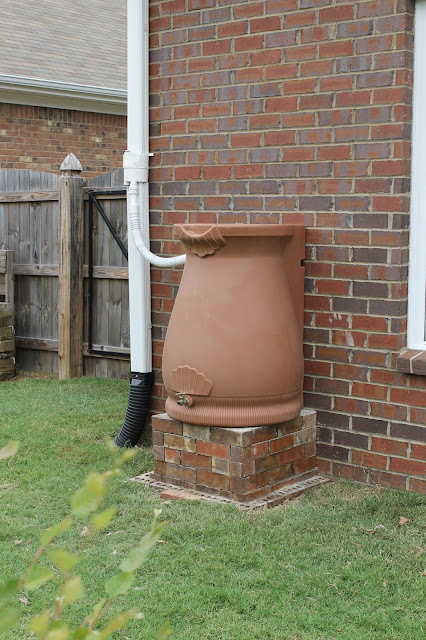
One more layer of brick on top and this rain barrel is not going anywhere.

More pea gravel added to the top layer.

Usually, when you begin one project, one more seems to come along. In this instance, the drain from the gutters had to be raised in order to fill the now taller rain barrel.
I took a quick trip to Home Depot and bought one length of gutter. After some basic measuring, Mr. Thrifty cut a piece in order to raise the connection port to the barrel.


Once the rain barrel was reattached, the Mr. realized that it was too high on the spout. If we allowed it to remain at this height, the rain would be pouring out of the barrel.
A little bit of trimming and the spout was level with the barrel.

Believe it or not, this project took us(well, the Mr.) under 3 hours to complete. Now we can water the trees in the front yard during drier periods.
And I was off on carpooling detail.
No comments:
Post a Comment