Friday, May 3, 2013

LACE BIRTHDAY CARD

It started with the birthday card.  Because I come from a large family, I began creating my own cards years ago.  In place of putting up bulletin boards in the past, this outlet let me hold on to this creative venture.  Also, I could personalize each card for every member of the family or friends.

Graphics Fairy and Vintage Moth gave me my first inspirations.  They send out free images as long as you don't make money on your product.

I found this cute image on Graphics Fairy.


After purchasing the Value Pack Blank cards and envelopes from Michael's or Hobby Lobby (use a coupon), I take out a card and fold it.
 
 
Fold the card on the scored line.  You are ready to create your card.
 
I take out my stamp and my stamp pad.  In this case, I used a brown stamping ink.
 
 
Randomly, I stamped the front of the card.
 
 
I took my postcard image and glued it onto the card.  An added piece of vintage lace, a mother of pearl button  and a salutation made off a word document, completed the card.  To give dimension, I put a foam dot under the Happy Birthday salutation.  Also, German glass glitter was added to embellish the broach.
 
 
You cannot go wrong making a card.  Mistakes don't happen, creations do.......
 
Try your hand at card making today.  In the future, I will share other cards that I have made.


Wednesday, May 1, 2013

MAY DAY


Welcome May.  I walked outside last night to look at the perennial bed(see David and Goliath blog, 2012).

Much to my amazement, I realized that the transported roots from Illinois  last summer were about ready to bloom.  These were my Grandmother's peonies.  The buds have been on the plant for a good week now.  I was anxious to see when the peony ants would come to chew the waxy outer covering to open up the peonies to all their glory.

Here is the picture I took.  We do have peony eating ants in Alabama!


The ants come marching in.......


 My fear of the Illinois peonies never growing in the south was gone.  These peonies are at least 50 some odd years old, because I remember them growing in her yard since I was small.  I also recall Grandma giving us peony blooms to decorate our May altar at home.
 
  By this time next year, I hope to share some of the cuttings with all of my siblings so they too can have a part of Grandma in their yard.
 

Tuesday, April 30, 2013

WHITE BARSTOOL TRANSFORMATION


The white shorter bar stools were the last to be transformed into black chairs with stained seats to be used around the kitchen table.


When we moved in, we had these shorter bar stools from the Little Rock home.  The counter was higher in our Alabama home, so they were not tall enough for it.

Mr. Thrifty took off the seats and we sanded them.


The wood turned out to be beautiful maple.


Now, it was time to make the two chairs the same height.


Then, he measured them to match the height of the Ikea table chairs and cut them down to size.


After cutting, some of the previous support holes needed to be plugged, wood puttied and sanded.


New holes were drilled for the support bars.


The chair was re-glued with the new holes and support bars.  The bars needed some serious wood puttying(is that a word?) and re-sanded.


Time again to get the spray tent out to prime the chairs.

My favorite spray primer.


This primer gives such a smooth finish.


Here the chairs are still drying from the primer.


The next picture shows one of the chairs with one coat of Lamp Black and the other with two coats.


The seats were stained, waxed and buffed exactly like the Ikea kitchen chairs. 
 
 
The transformed former bar stools.
  
 
 Now, the kitchen counter, the table chairs and 2 extra former bar stools all compliment the table.


Saturday, April 27, 2013

IKEA KITCHEN CHAIR TRANSFORMATION

We bought 4 non-stained Stefan chairs from IKEA back in 2005 for the eat in kitchen area.   At the time they were $19.99 apiece.  Now the black stained ones go for $24.99, which still is a great price.  For 8 years, I just used them as is. 


They are a very plain style.  At first I was going to paint them an array of pastels.  That idea didn't last.  Once we bought the used oak round kitchen table, stain needed to be applied to the seat to fit in with the rest of the look.


Now it was time to finish them to match the rest of the kitchen.  Once we moved into the house, we purchased 4  black and stained bar stools. (I realize that only 3 stools are showing.)


Previously at the old house, we bought 2 white bar stools.(This will be a later blog)


It was time to coordinate all the chairs with the same look.  Mr. Thrifty took all the chair seats off and we began the sanding process.


The hand sander worked well.


Once sanded, I stained the seats with 5 coats of Minwax Golden Oak stain.


2nd coat.


Notice that I have 6 chair seats.  Two belong to the white bar stools that came out very well sanded.

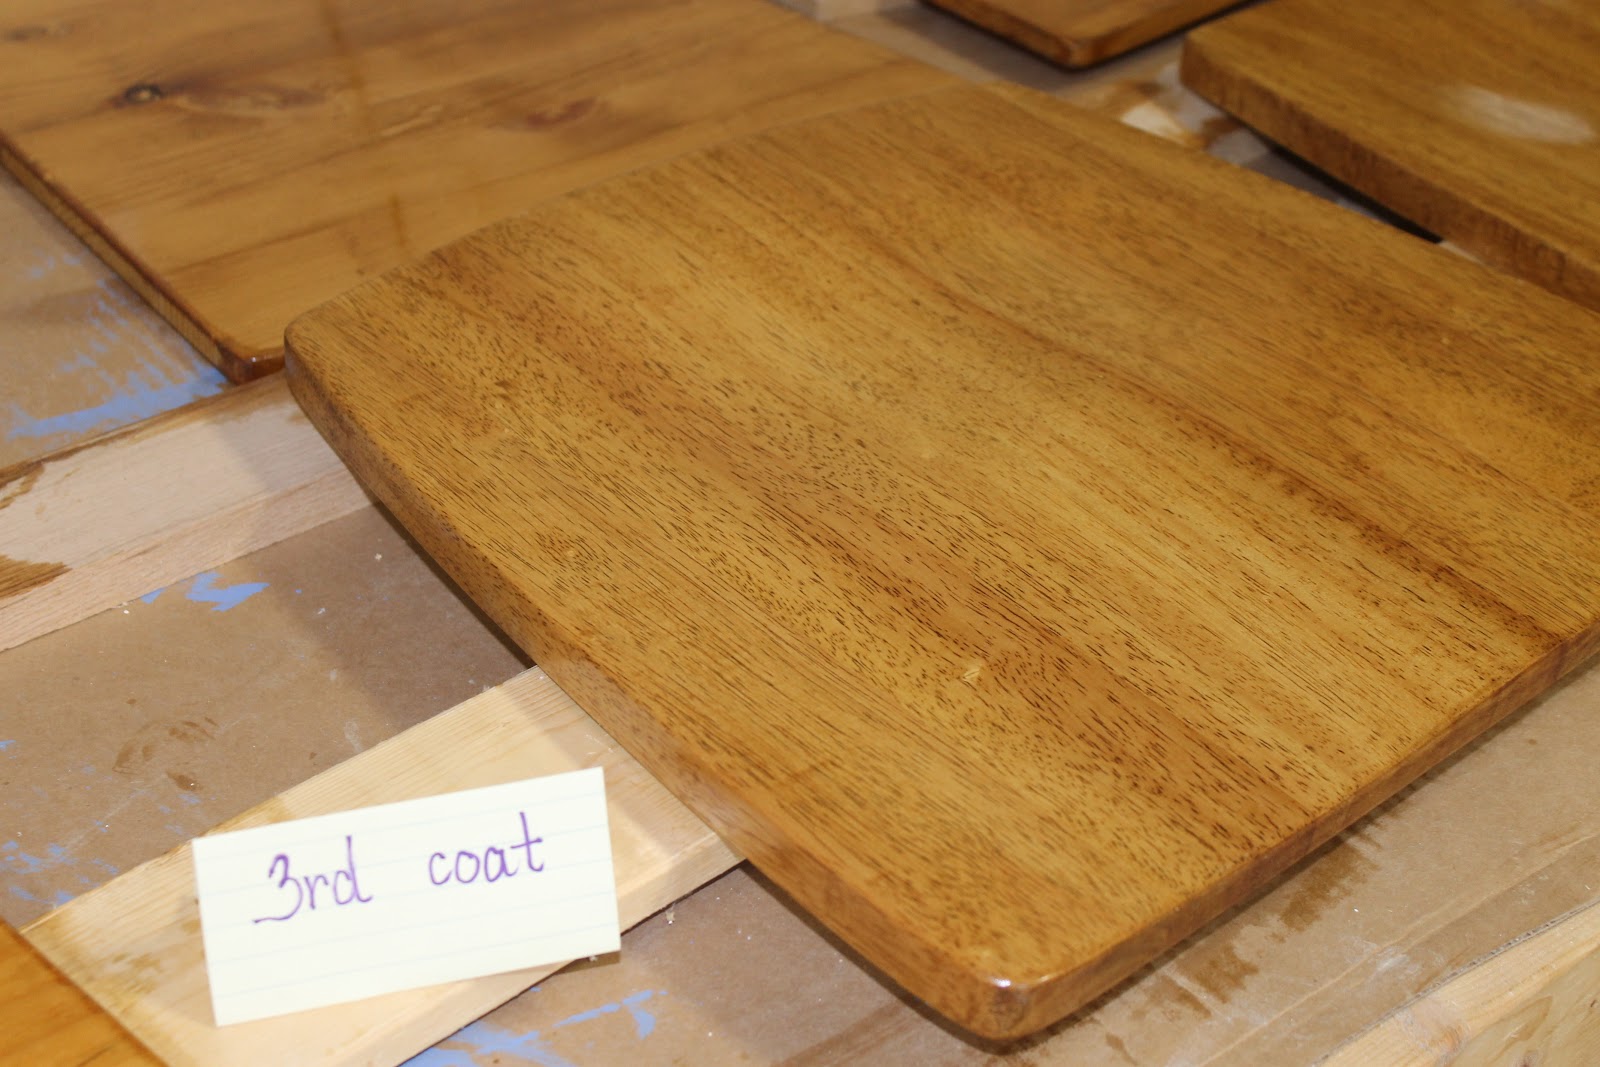
3rd coat.


4th coat.


Finally, the 5th coat.


Patience is not one of my virtues, but it was necessary for this project.  The seats needed to come as close to the black and stained bar stools that we had presently in the kitchen.  Therefore, stain, sand, stain, sand, stain, sand....you get the picture.  IMPORTANT NOTE:  Make sure to sand with 220 grit between coats of stain.  Wipe with a soft rag before reapplying the next coat of stain.


We rough sanded the remaining frames with the hand sander.  This was very easy because the chairs all had straight lines.  Curves, had we had them, would have needed hand sanding.  This process went quickly.

Time to prime.  I hardly ever paint when priming anymore. I love this primer.
It is so important to follow the directions.  When it tells you to shake it, do exactly as it says.  Following the directions will give you a smooth coat and no drips.
 
 
The chairs are primed.


The weather has been so unseasonably cold here.  I created a spray tent in the garage.  It doesn't look pretty but it works.  Spray paint will leave a film of paint dust if not enclosed.  Another FYI with spray paint--If you wear glasses, use a cheap pair of cheaters.  I guarantee you that your glasses will be ruined if you wear your prescription pair.
 
 
 The actual painting came next.  I used the great Lamp Black paint that I had previously used on the Updated Mantle Mirror posted March 1, 2013.


Here is the finished chair minus the stained seat.


Mr. Thrifty reattached the seats.  Here is a photo of the chairs with the bar stool. 
I think they match very well.


Now the kitchen eat in area seems more complete.


All that is left is to finish the two white bar stools so all the chairs are compatible.


Wednesday, April 24, 2013

VINTAGE UPDATED PAPERWEIGHT

My sister Karen has just redecorated her master bedroom with the bird nest theme.  I wanted to make her something special to place in the room.

                    I had in my stash a vintage glass paperweight for many years now.  I still remember the estate sale that I purchased it from.  My oldest daughter was 18 months at the time.  She is 15 now.

 
I found a sweet vintage image of a cat bird with an egg in my hard drive.  Now, I just had to print a copy of the picture in the right size to incorporate into the glass.
 
This one came from Graphics Fairy.
 
 
Since one of the main colors in the room was robin's egg blue, this was a perfect choice.
 
 
After printing it, I used a corner punch from Anna Griffin and accented one corner.
A strip of gold adhesive border was added to the top.  The picture was then placed on a sky blue crackled scrapbook paper.
 
 
Once placed in the glass, I added two pieces of cardboard to the back of the picture to hold it into the back of the frame.  A piece of sky blue felt was measured and glued to the back of the frame.
 
 
Another view.......
 
 
And the final view of the paperweight.
 
 
It was fun to create a special gift for her newly finished room.